The EXC450 Nomad Black EditionWe've built quite a few Nomad EXC conversions before we started on this Black Edition. This is my (Aad) personal bike and came about for slightly different reasons than most. I'm not an enduro ace, nor an avid rally rider. I was simply looking for a bike which would bring the fun back in riding for me. A bike on which I could explore all the beautiful places in this world, without having to turn around when the road ends and the track begins… Add to that chronic back problems, which are only getting worse as I get older, which meant I had just two firm criteria for my next bike: it had to be light weight and have superb suspension (so I can ride for a few more years…). It was literally this or realise that my riding days would be over in the near future. Rather than settling for a comfy car and looking from the sideline I opted to go all out and get myself an EXC450...
Unlike the Beta, the EXC was well known territory for us. I've been quite impressed with KTM/Husqvarna quality of design and workmanship over the years and their products somehow just 'click' with me. The way it's put together all makes sense somehow and working on them is a pleasure. Remember that I come from a very different age and riding preference than Mike. He grew up on an Australian Outback Station and later Tasmania. His first bike was a TTR125 Yamaha. When I started working on bikes we had aircooled RM125 Suzukis and screaming Gebben Kreidlers. Soon after I moved towards, what is now known as, classic bikes like BSAs and Triumphs. That's why I took a Triumph Bonneville around the world, including all the off-road tracks we did (during which it broke three sets of shock absorbers, which may have had somewhat adverse effects on my already suffering back… :-) I love working on enduros as for me they resemble everything I like about classic bikes. They are simple and logical, not an unnecessary part to be found on them anywhere and as they are used in a racing environment they are serviceable too. That last bit, being serviceable, is something which I feel is underestimated. Most bikes are no longer service friendly, enduros however are as they have to be easy to fix during races. That it took so long before I bought one is purely because we were still very much in the startup phase with Nomad-ADV, which made me feel a little guilty in spending money on a bike, while I could also spend it on more machinery. In the end it was Mike who said 'Buy it! There are more important things than work!'… |

|
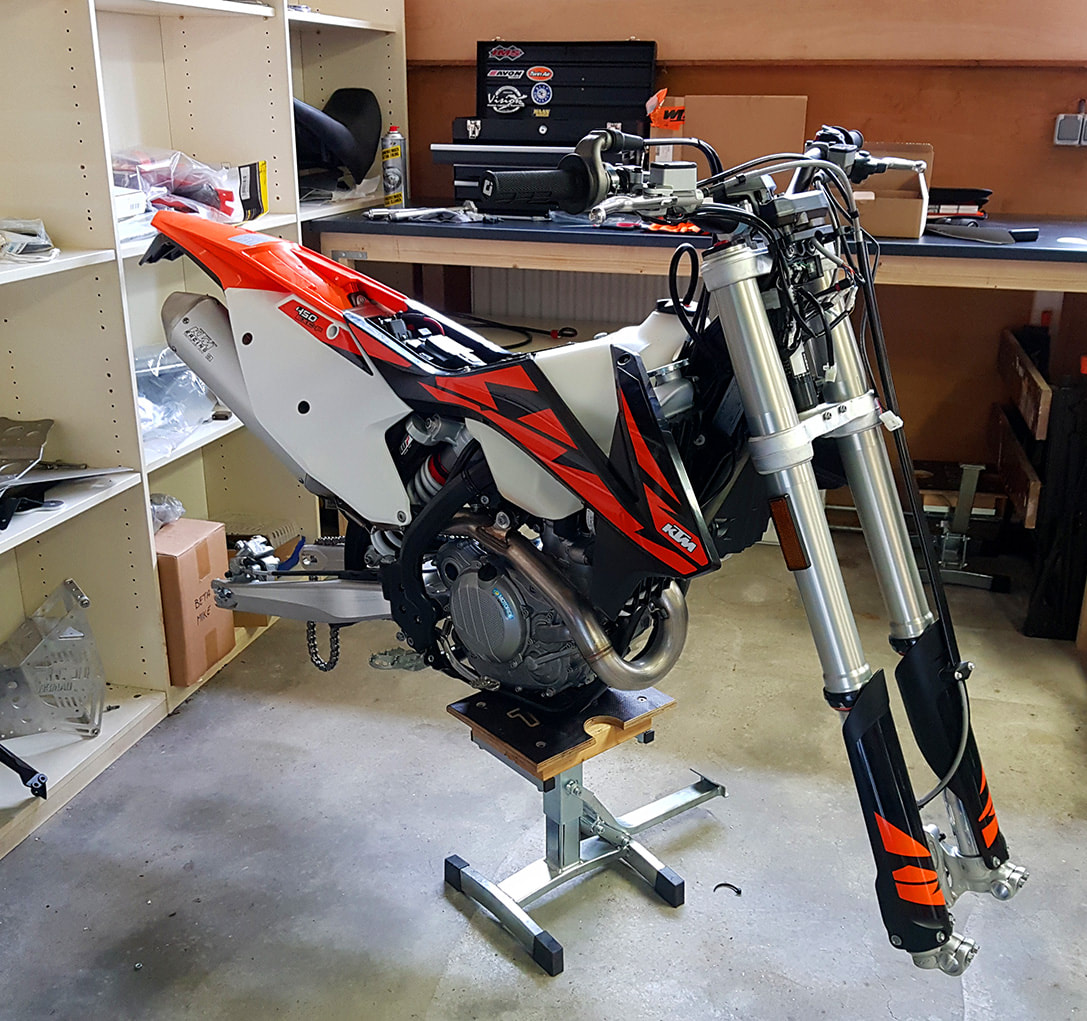
This is how the KTM EXC450 arrived in our workshop. The original tank is only there to keep the fuel pump and plastics in place
|
Why an EXC450?Why not? Ah, you wonder why I didn't go for the 500… well, I've ridden both and to be honest there is very little between them. They are both great bikes. Both are more than capable of what I want to do with them. There are however two reasons why I opted for the 450, the first is that I feel the engine revs out a little smoother than the 500 which gives it a wider range in the gears. In general the 500 seems to vibrate a bit more but as I'm used to riding 650 and 750 Triumphs… vibration isn't an issue for me :-) The second reason why I opted for the 450 is because there was just one 2018 model left at the local dealer with a black frame, which I prefer over the 2019 orange one as I wanted to make a 'Black Edition'. I bought the bike brand new but without wheels, headlight, seat and tank as we were all going to change them anyway. We literally bought a frame with an engine, some of the plastics and wiring!
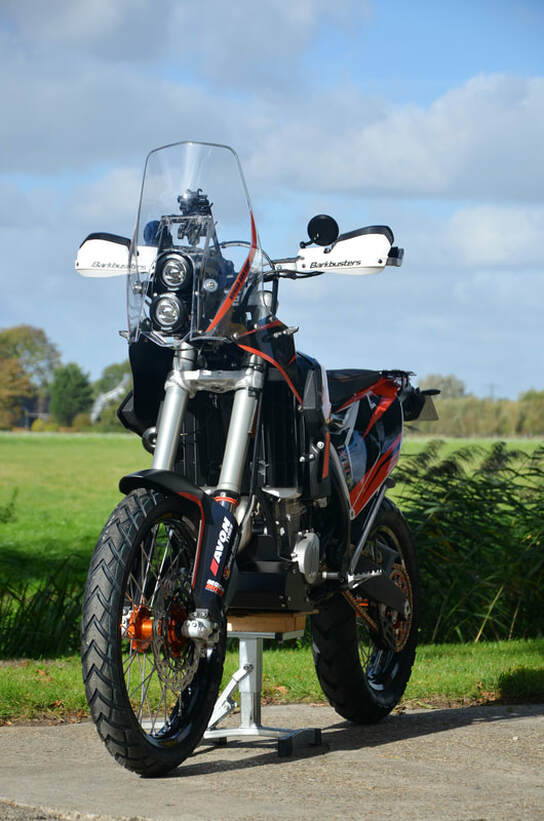
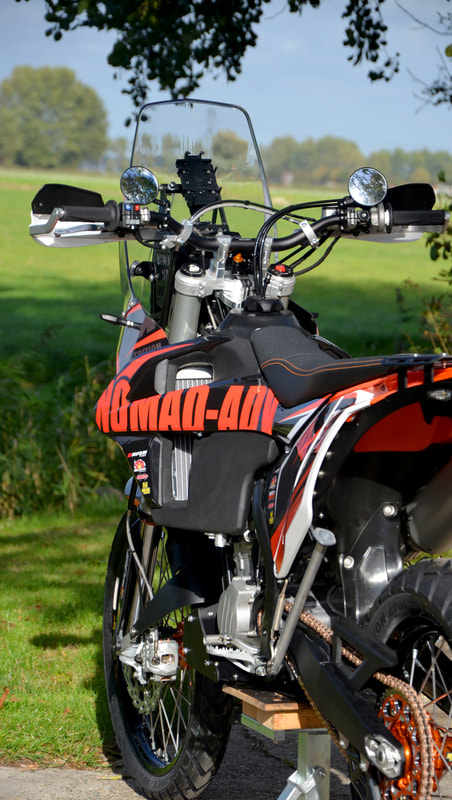
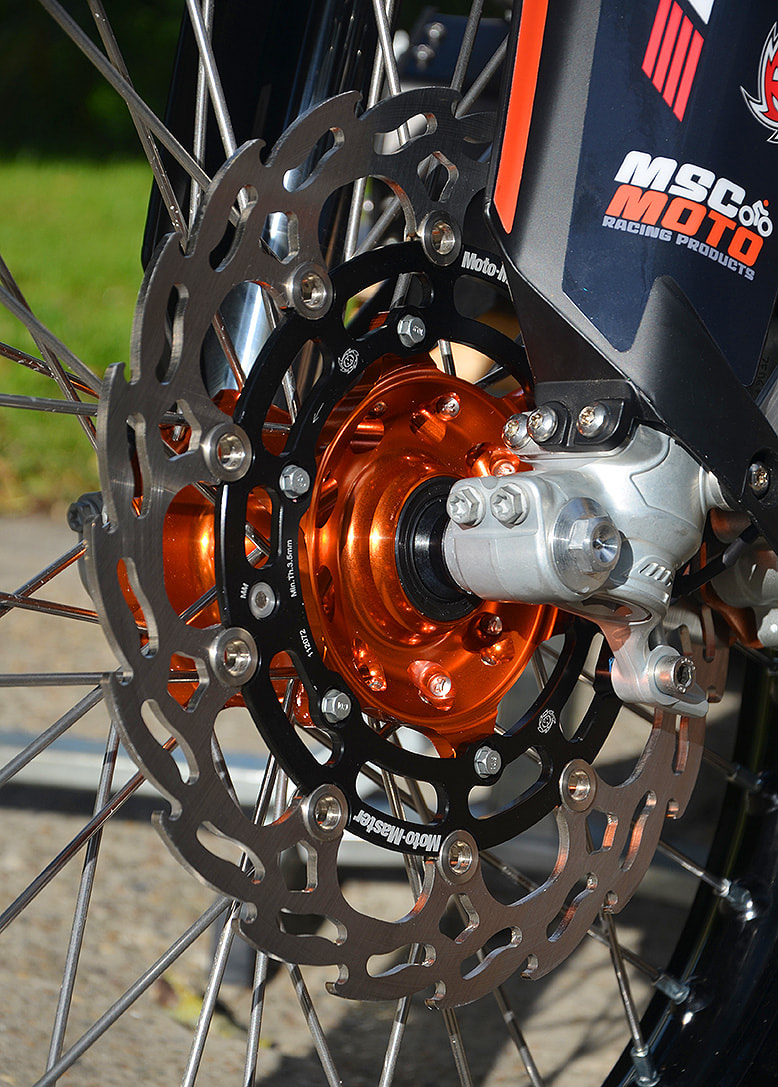
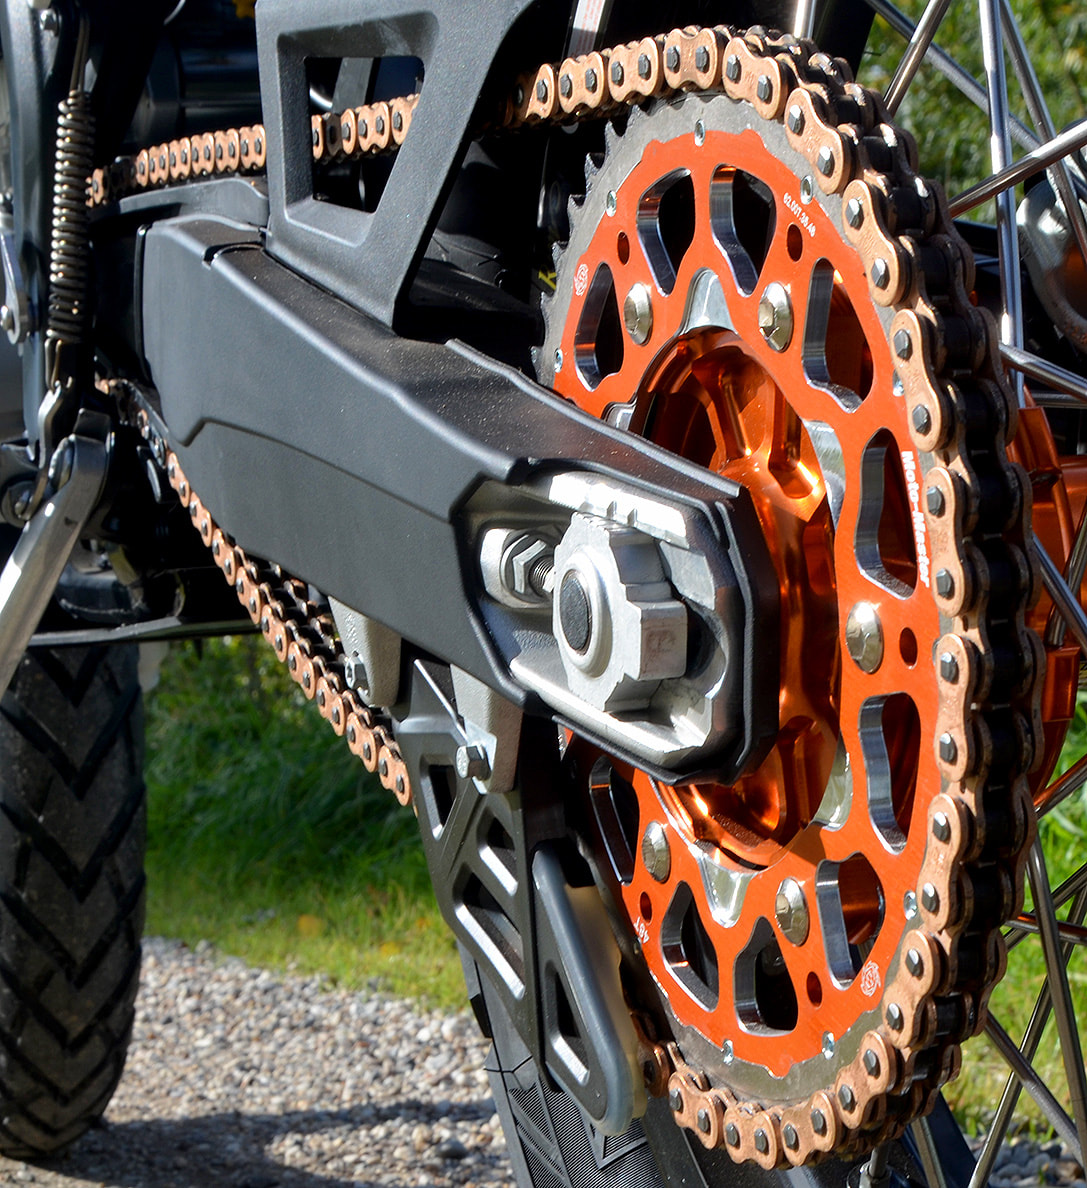
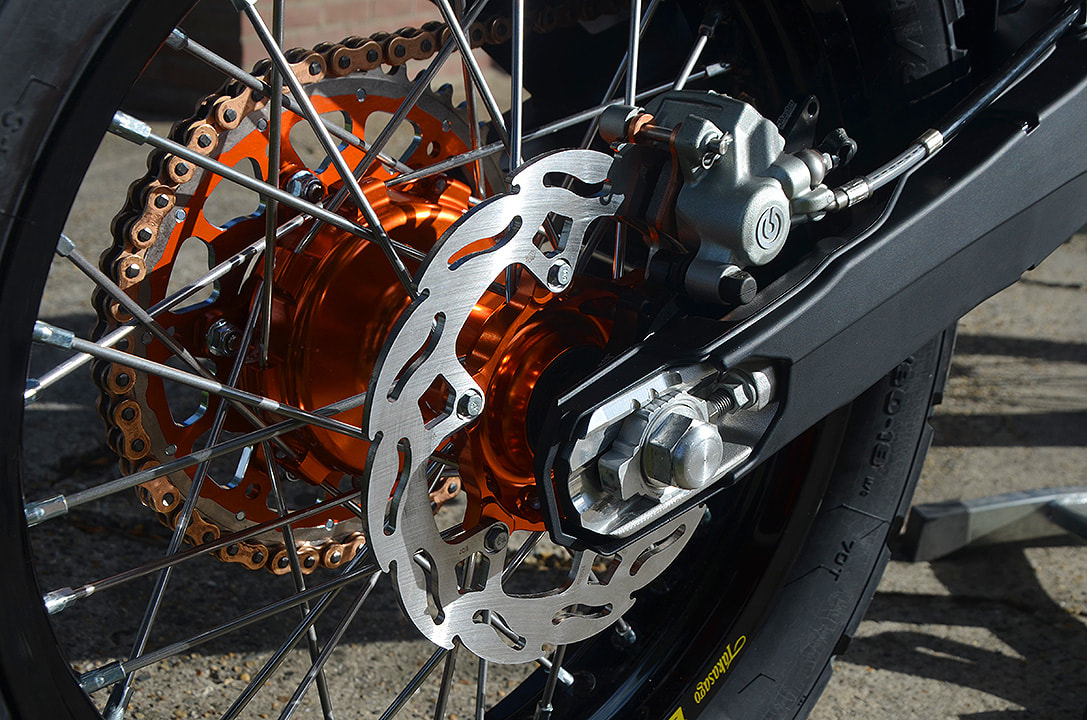
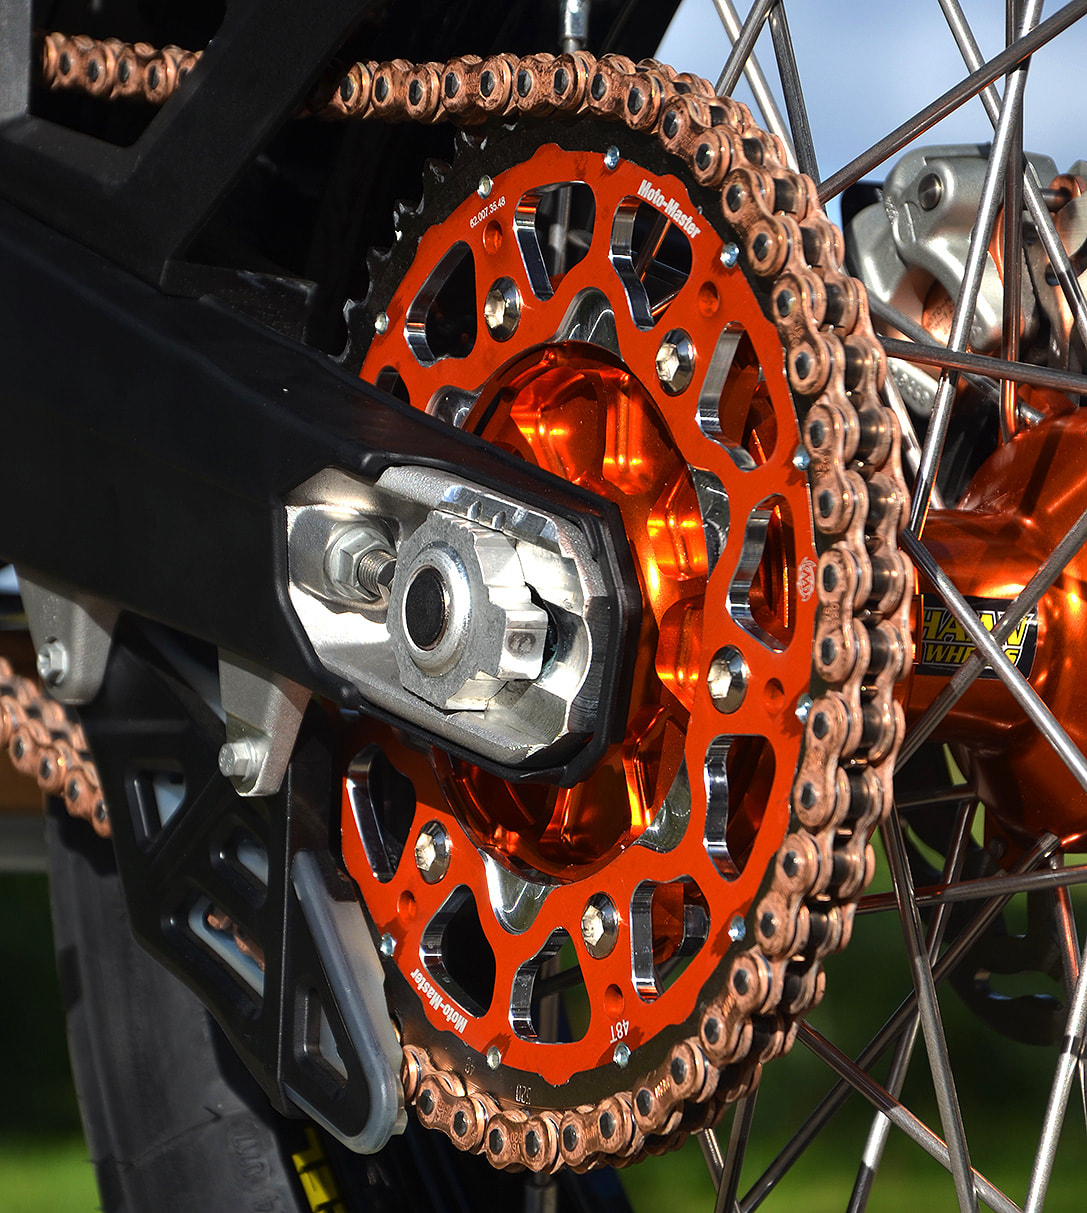
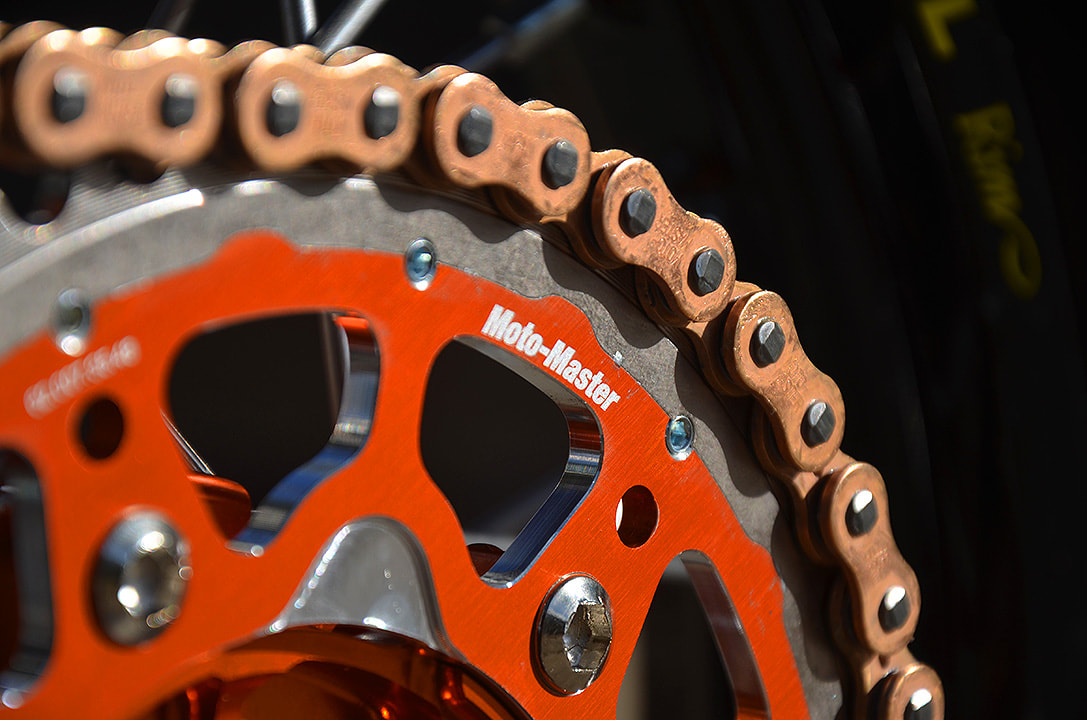
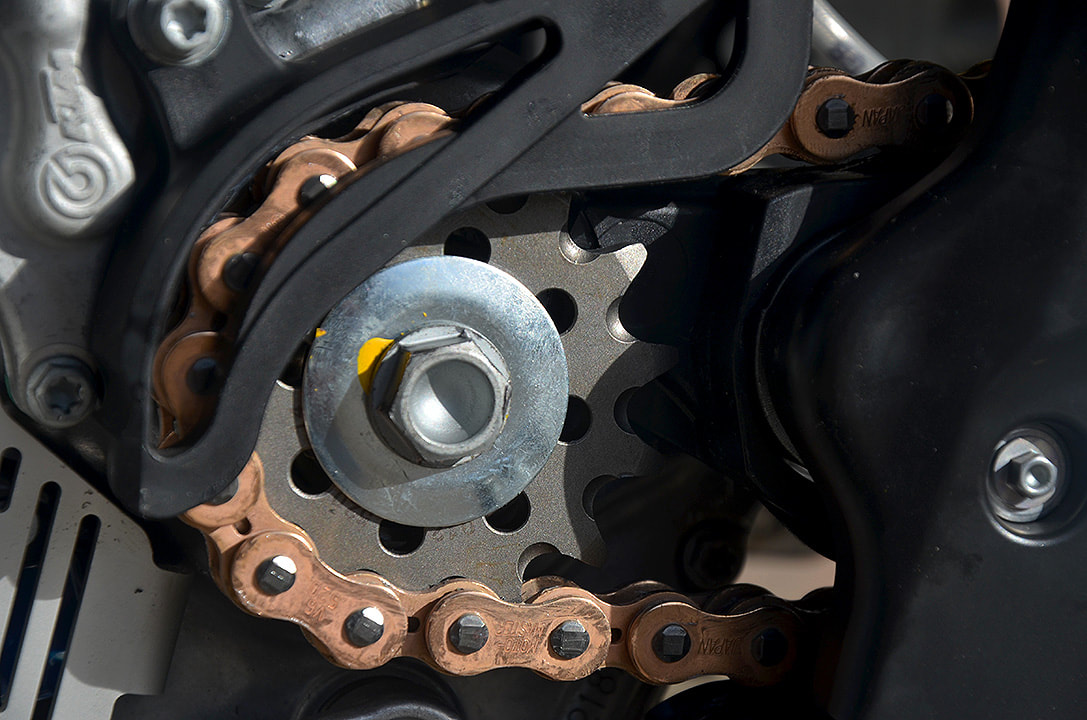
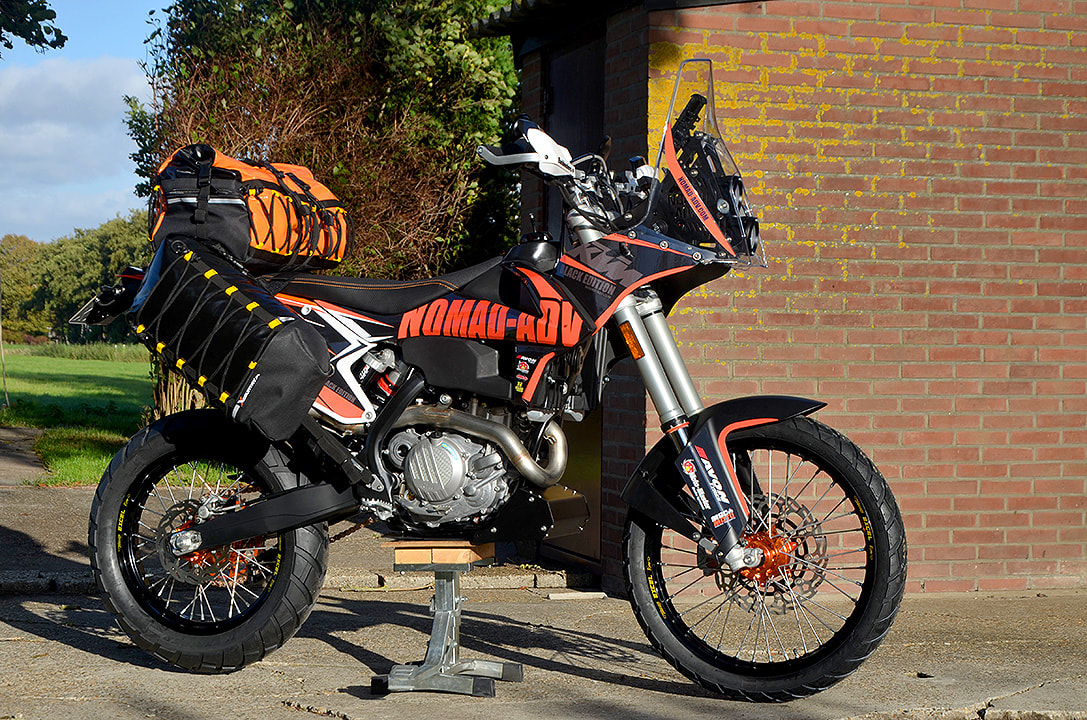
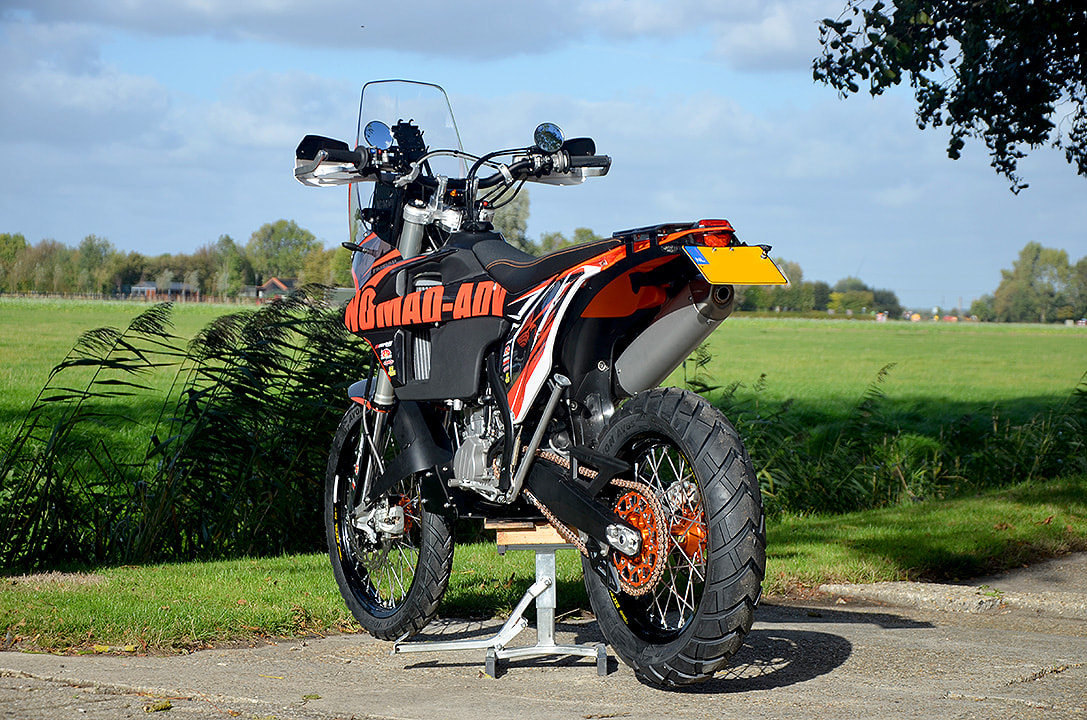
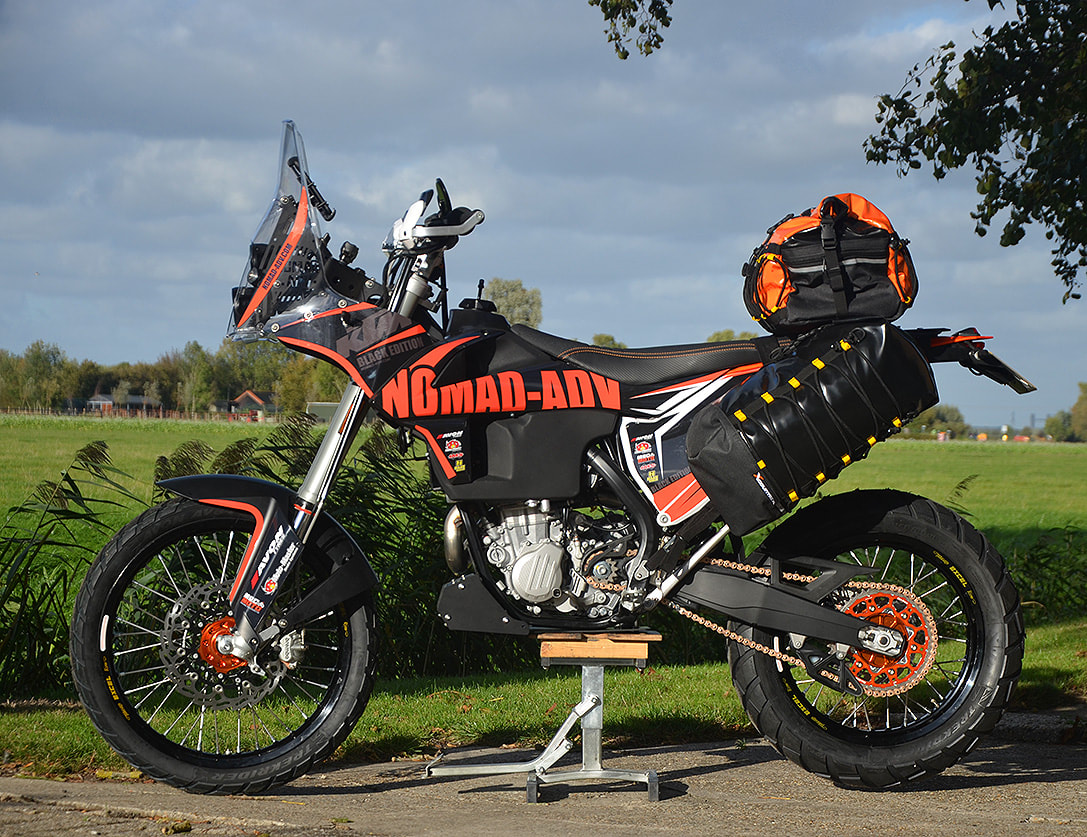
Building the Nomad-ADV Black Edition This was going to be just a plain 'standard' conversion but then in black. As time progressed however it became more and more a showcase of what we can do. An exercise of how far can we go and how good can we make this thing as a travel bike. We literally pulled out all the stops and built what we believe is the ultimate EXC450 travel bike. It bristles with top quality components, we didn't for instance just fit a better brakes but went for the same MotoMaster brake conversion as used by the KTM Factory Dakar Team. A top quality MSCMoto Steering damper, the best we've seen yet, controls the handling. It makes the bike track true in sand and very stable at highway speeds and in cross winds. We fitted beautifully machined MotoMaster aluminium sprockets with a chrome steel outer sprocket ring, not only to enhance the look, but also as they are very long lasting. To power the accessories we made and fitted a totally separate wiring loom, with its own 5 built-in fuses. Like on the Beta, all the changes we made are for travelling purposes. They are aimed and increased usability for travelling, not racing. You'll notice for instance that we haven't made any performance improvements as the engine is fine as it is for what we do. Increasing performance shortens service intervals, increases fuel consumption and reduces the mileage we can expect from the engine. All of which we don't want on a long range travel bike. The changes are pure and simple to allow travelling over long distances, increase comfort, allow for luggage, charge our phone and small battery pack. Some modifications have found its way into the rally world too, such as the navigation tower as the wind protection offered is a bonus there too while it can also accommodate for the ancillary rally equipment such as a roadbook, trip meters and iritrack. We've listed the changes and the reasons why below, we'll start at the bottom and work our way up. |


|
Wheels
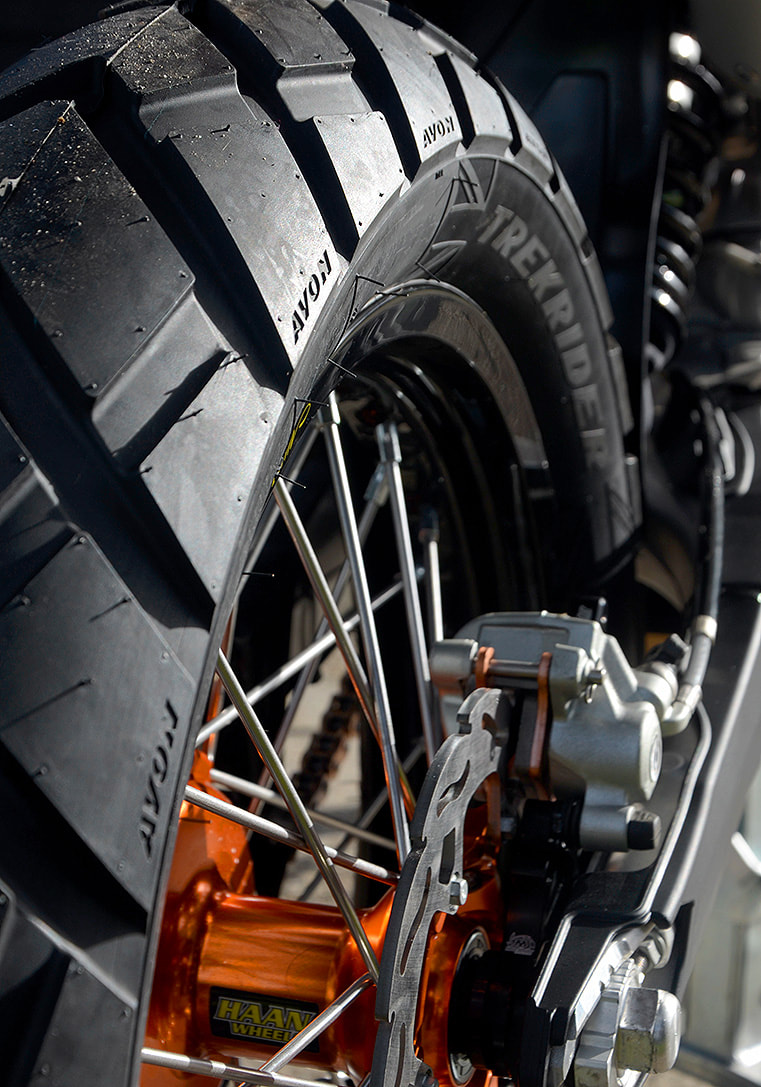
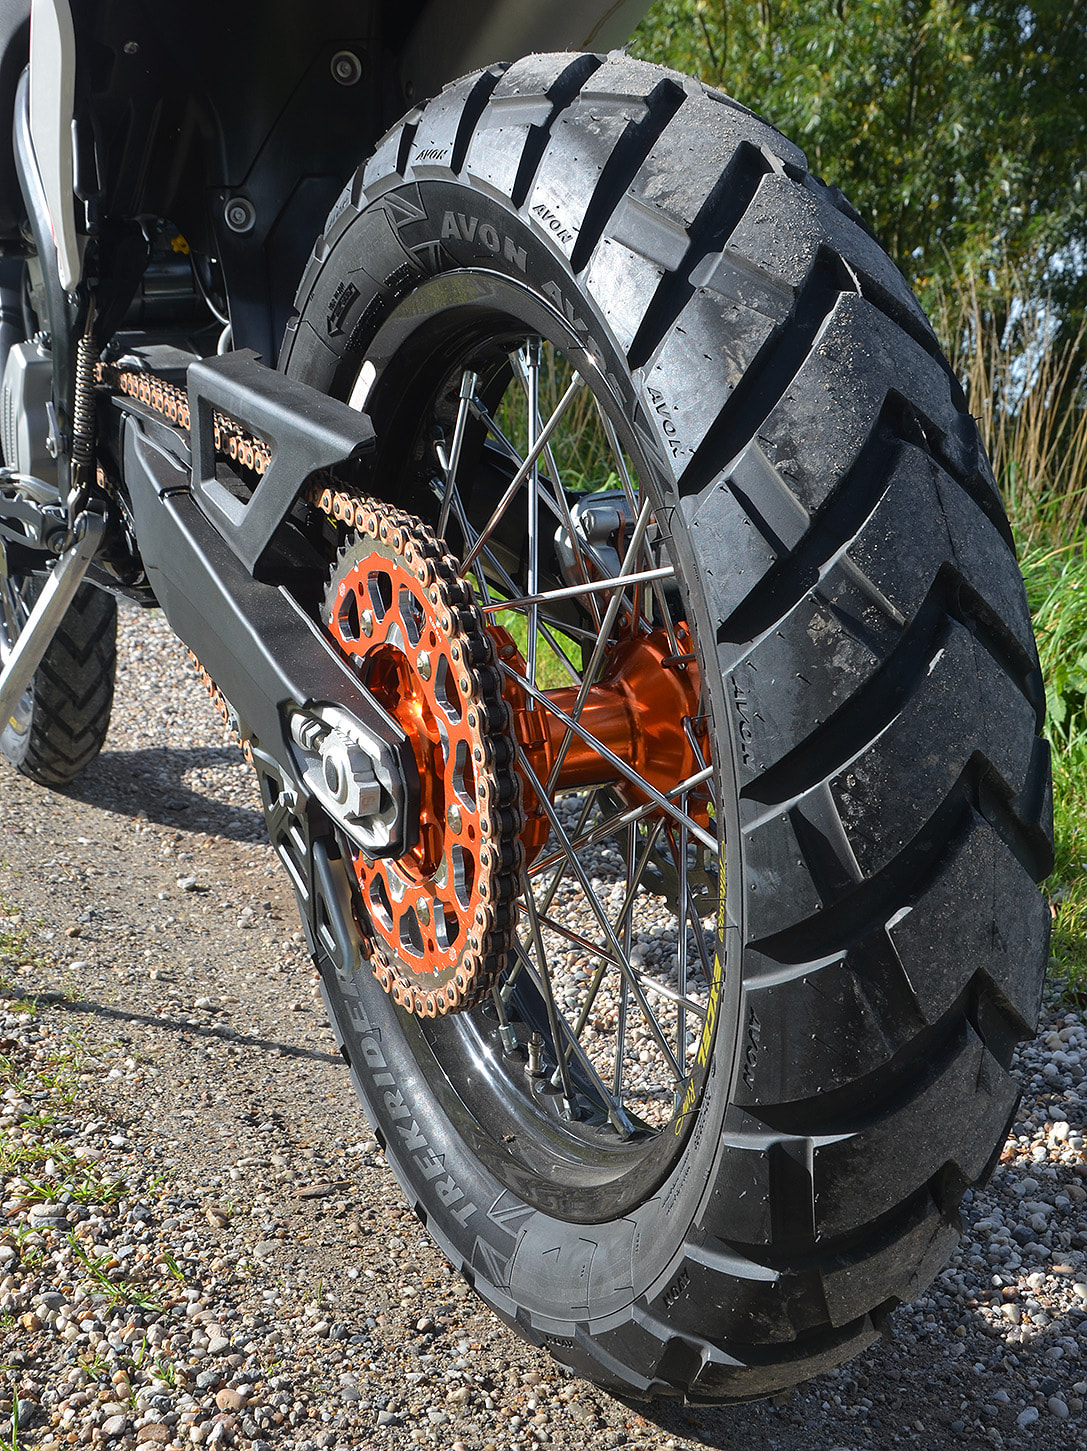
We changed the wheels for Haan ones for three reasons. They have a cush drive hub, are stronger than OEM and can be specified with a wider rim. We fitted wider Excel rims than OEM to allow for a wider choice in dual sport tyres, in the next paragraph we explain why. At the front we fitted a 2.15" and a 3" at the rear. I had actually asked for aluminium coloured hubs but Haan had assumed it was to be orange as it was for an EXC, I'm glad they did as they look much better. The original wheels don't come with a cush drive hub. A cush drive hub is one where there is a shock absorber fitted inside the hub between it and the rear sprocket. It acts as a cushion in the drive chain, hence cush drive. It smooths out pulses generated by the big single engine, makes the gearchanges smoother and dampens any sudden load changes on the final drive. On a wheel with a rigid mounted sprocket the ride is harsher and load changes and pulses tend to damage the splines on the output shaft and give chain and sprockets a harder time. The Haan Wheels are a lot stronger than OEM as they use billet machined hubs, heavier gauge stainless spokes and Excel rims. Tyres Knobblies or knobbly derived tyres might give good grip in loose off-road stuff but they are horrible things on the road. Their roadholding on asphalt is very poor, they are unstable at speed and are worn out before the engine has been properly run-in. That's not intended as negative towards knobblies, it's simply using the wrong type of tyre for the job. We try to find as much off-road as we can but there is no denying that in Europe and most other parts of the world we simply have to cover large distances over asphalt roads to get to the off-road or gravel roads. A 50/50 tyre is therefor our choice and we feel the Avon TrekRider is the best of the lot. Being made in the UK, where it often rains cats and dogs and where single digit temperatures are described as 'a nice fresh day…(!)' you would expect good roadholding in wet and cold conditions from Avon Tyres, and they do. We also used them in 48°C in Kazakhstan on the road from hell, they shined there too (literally because of tarmac so hot that it melted to my boot!) They don't have a knobbly type thread pattern, which means non of the noise and vibration issues associated with knobblies and a perfectly smooth ride on the road. Off-road their V-shaped pattern means they push mud and loose stuff to the side, just like a tractor tyre if you like. It works very well and makes the bike stable on muddy roads or tracks. Just like the Avon TrailRiders, which we have used on our trip around the world, they last a long time too. Not as long as the TrailRider as the TrekRider uses a softer compound which not only helps in ensuring more grip bit also helps clearing mud from the threads. We still got 14,000km out of a set on the earlier purchased Beta though. We don't use rim locks as the Avon tyres we use don't need them. On our trip around the world we used Avon Distanzias and TrailRiders for over 120,000 km, had several flat tyres due to nails, seriously thick cactus needles(!) and stray fencing wire and even had to ride on with a flat front for 120km at some stage without the tyre coming off the rim. On the Beta we used tyre pressures as low as 12psi at the front without any issues (except higher tyre wear). Brakes The original brakes on a KTM aren't bad to be honest and I had wondered if fitting oversized brakes would perhaps be overkill… The thing is that brake fade is more of an issue when travelling, especially when coming down mountain ranges with multiple hairpins. Of course we use engine braking as much as we can but... there are times where traffic in front of us or simply enthusiastic descents can lead to a lot of braking... :-) The MotoMaster Dakar brake conversion is not just an oversize, they are in a different league altogether! Their stopping power is nothing short of awesome, both in controllability and in outright stopping power. On top of that you can slam them on again and again without even a hint of brake fade. The forks have no issue with the increased stopping power and the Avon TrekRider tyres we fit can handle the braking forces well (there are quite a few tyres around who will give up though…) What amazed me too is how easy the brakes are to control, no grabbing, no jerking motion as with many other wave discs, just smooth stopping power which ranges from a gentle slowdown to a linear full on anchor as you squeeze the lever harder. They are truly awesome and I'm very glad we went for them. Suspension Apart from setting the pre-load as per manual and changing the spring for my weight plus luggage we haven't changed a thing… yet. To be honest they are quite good straight out of the box, much better than the Beta (for travelling purpose that is). We are working on something unique though… more on which later. Chain and sprockets
An EXC is normally setup for enduro racing and come with a 13/52 sprocket combination. Experience learned us that a 14/48 combination of front and rear sprockets is generally the best setup for travelling. As we cover long distances we also need chains and sprockets that will give us a decent mileage. Having tried MotoMaster sprockets, which are made right here in Holland, we were pleasantly surprised. The centre is beautifully machined from aluminium and anodised, resulting in light weight and good looks, while the outer sprocket ring is very hard steel. The result: an easy 14,000km on the rear sprocket while riding a combination of off- and on-road…! |
|
|
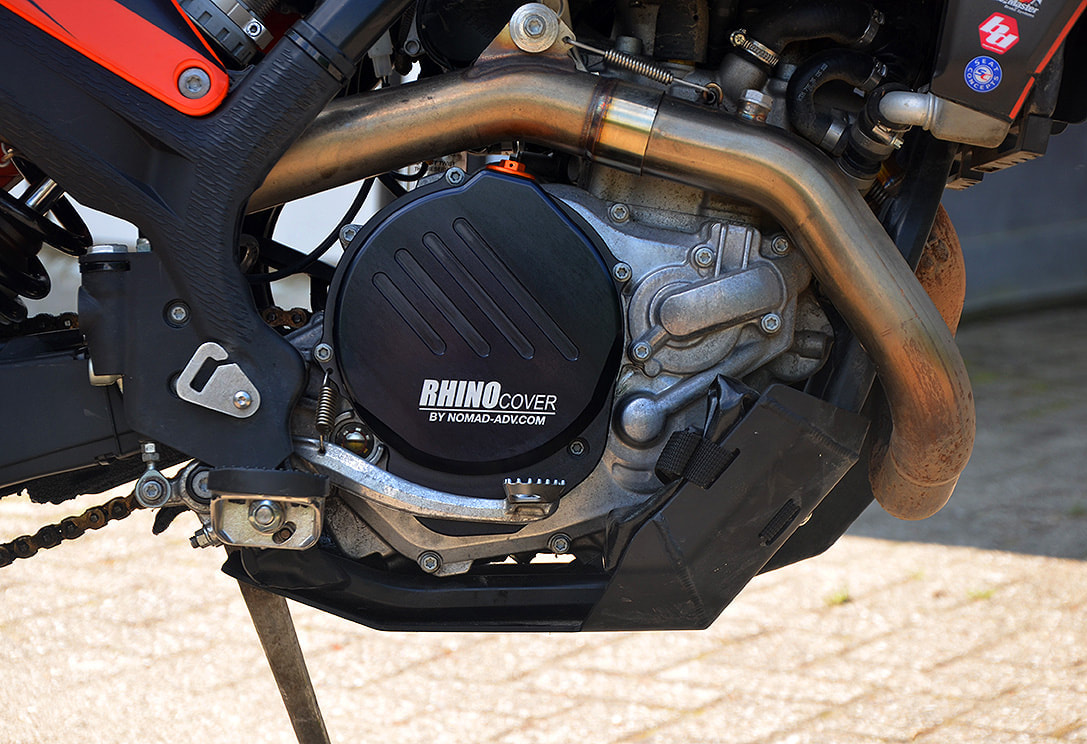
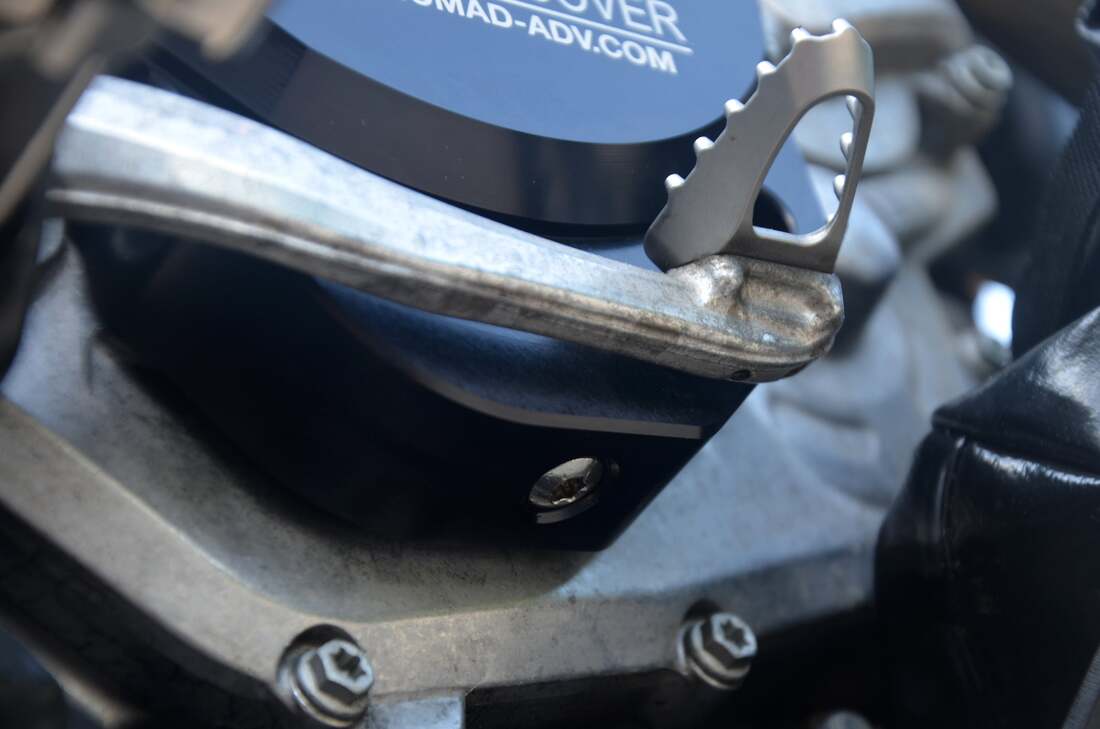
Large clutch cover
This one takes some explaining. While most will fit a protector to the easy to break Magnesium OEM clutch cover, we went the other way. Fitting a protector over it is in our view the same as fitting a plate in front of your radiator to protect it from stones. The engine casing is needed to cool the oil and how's that going to work when you cover it up with a slab of plastic? We've therefore fitted the Nomad-ADV billet Rhino clutch cover which is so strong that it doesn't need a protector… in other words full cooling and protected. But it gets better. As it's bigger it allows for approx. 300 cc extra engine oil… and we all know that more oil means extended service intervals and better cooling of vital components. There's a small pocket straight under the clutch which will trap most of the clutch material being thrown out due to centrifugal force too, so it will keep the oil cleaner. It has a separate drain plug which allows draining it and give info on the state of the clutch at the same time. The original brake pedal can be used as it's no wider than original. It's light weight too, all in all truly a win-win situation. 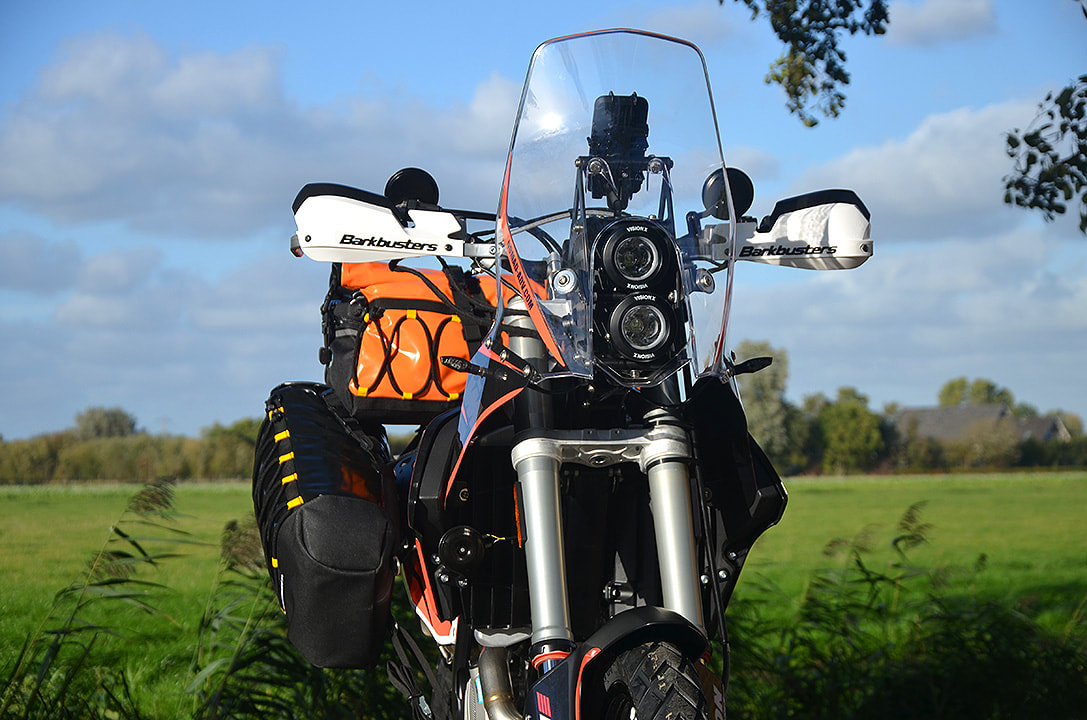
|
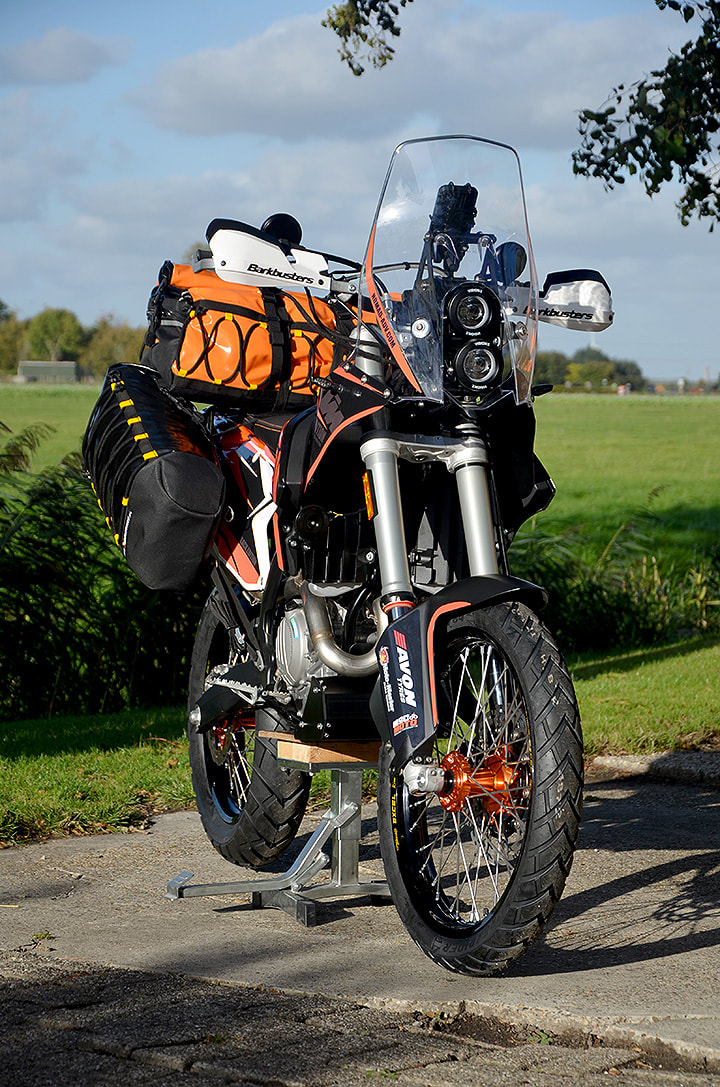
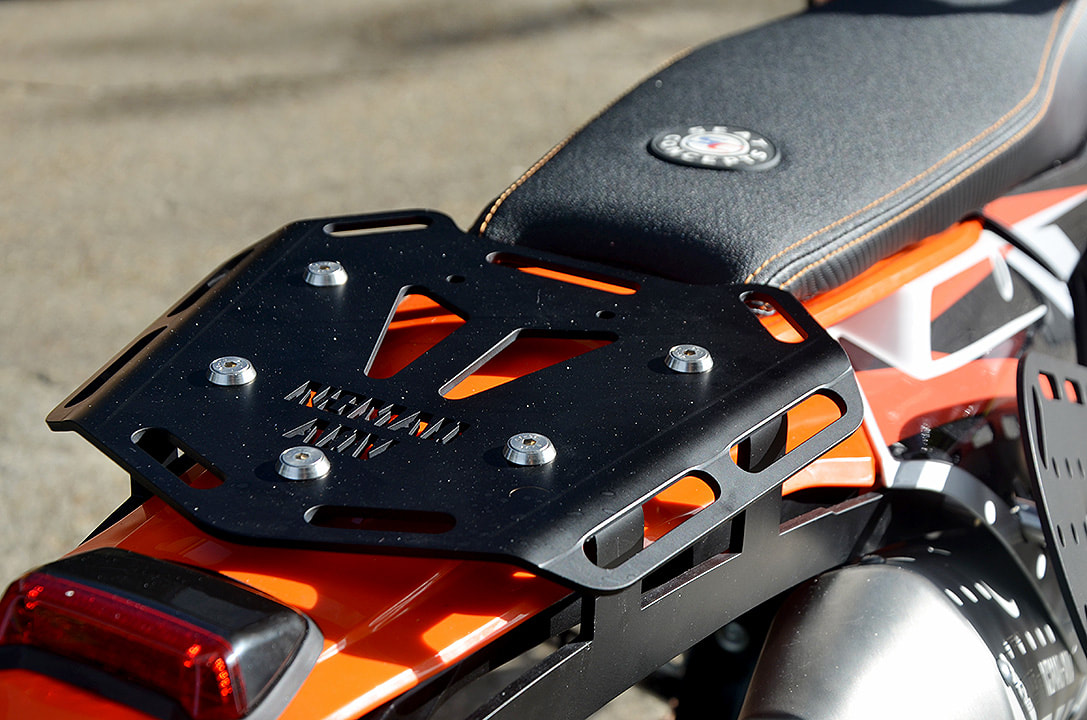
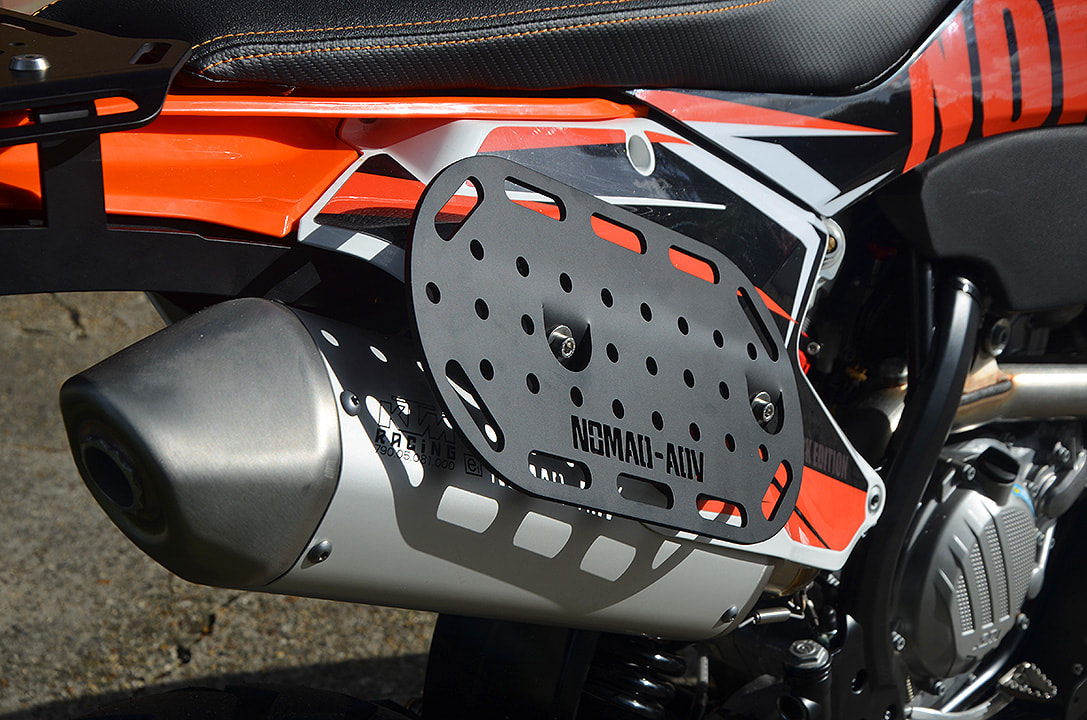
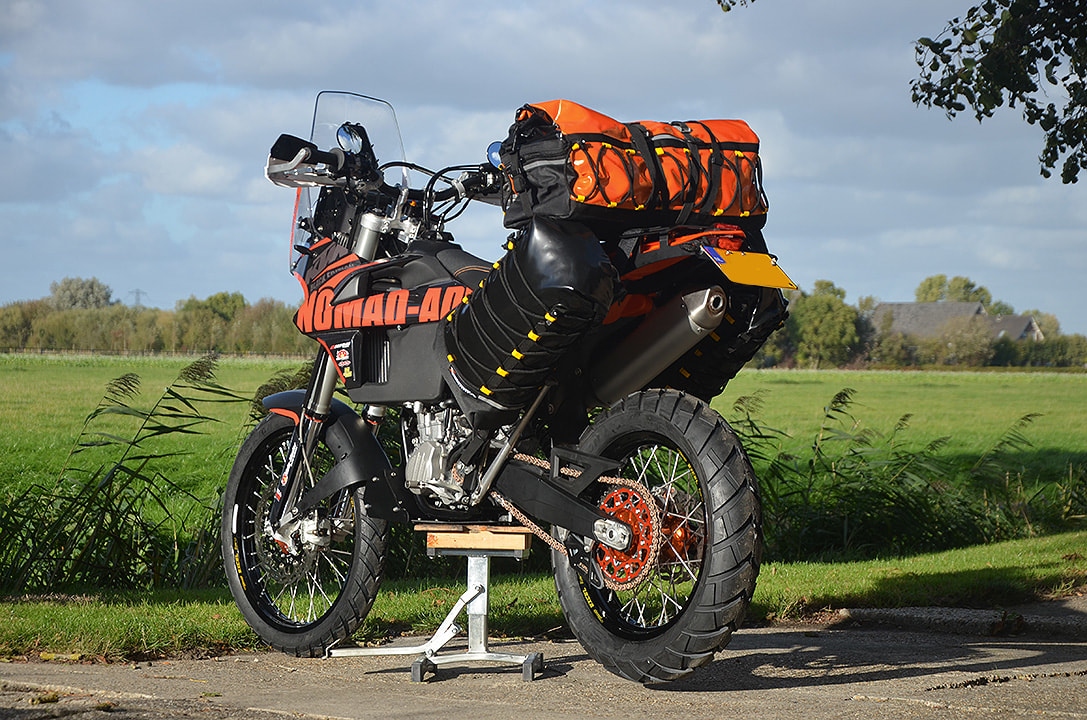
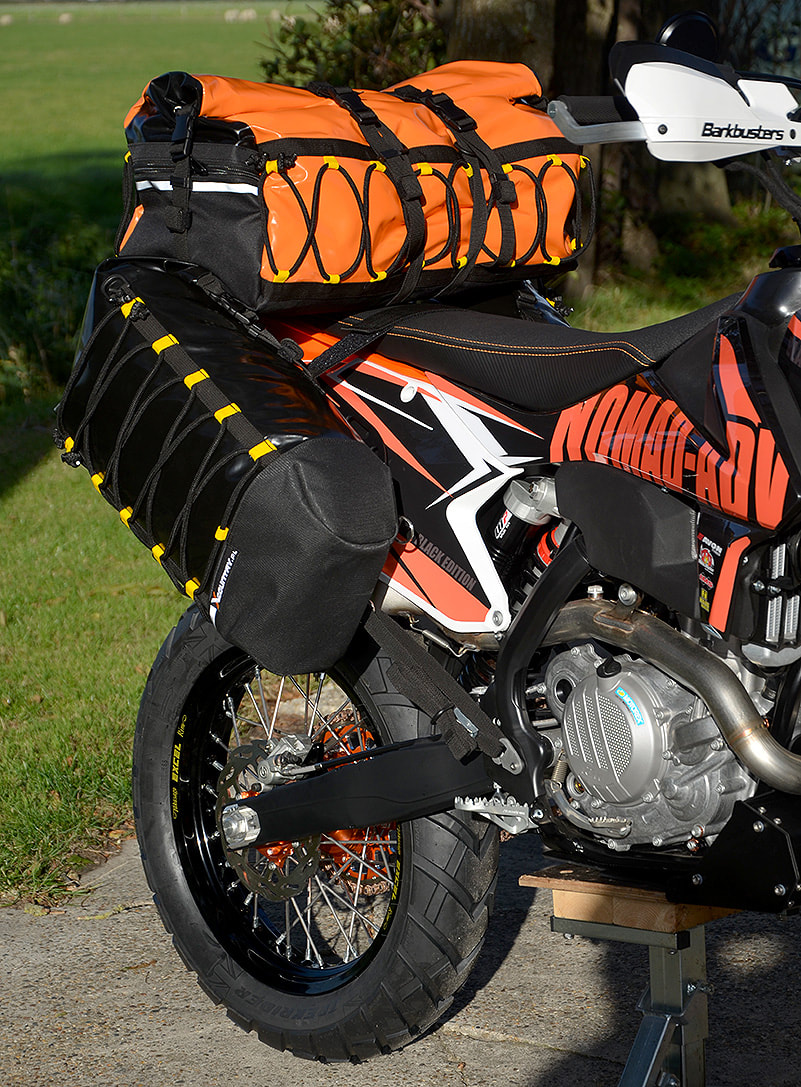
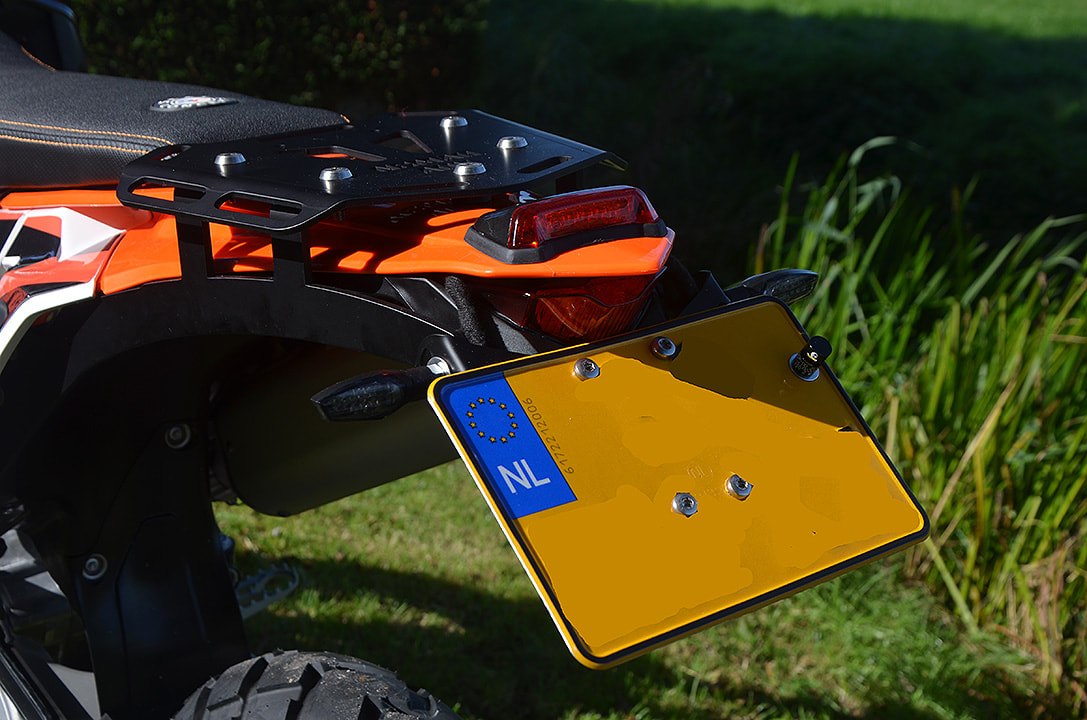
Luggage
The KTM EXC 2017 onwards models don't have a rear subframe you can bolt onto. They have a self-supporting construction where each part in itself isn't strong enough but once bolted together will gain their stiffness. We thus had to make a luggage rack along the same lines. We've therefor made an aluminium luggage rack for it which has it's own subframe. Fitted to the exhaust mounting points at the right hand side and three different locations on the other. It strengthens the rear end rather than putting more strain on it. It took me three complete strip downs to work out how to make it but we did get there and now have a strong luggage rack that weighs just 0.9kg all up (yes just 900 grams !). As it is the Black Edition, the luggage rack is anodised in black too. I fitted X-Country Enduro saddle bags in black but chose an orange X-Country Highlander at the top for better visibility in bad weather. Exhaust We left the original exhaust in place. There is more than enough power, the sound is good and the engine is running sweet and very frugal. On long highway runs at 100-110 km/hr it returns a very consistent 25 km/litre. Take the twisty B-roads through hills and villages and it returns… 25-26 km/ltr. Potter around in 3rd and 4th gear through a National Park and we get… 25-26 km/ltr. The lowest I've had was 24.5… The exhaust doesn't get particularly hot either. For the moment I can't see why I would want to change it. Fuel tank To get more range and thus allow for longer distances, we fitted a bigger tank. Just like on the Beta we chose an IMS tank. There is an Acerbis tank for the EXC too but the IMS is better looking and a better design gives 2 litres more than the Acerbis tank without being wider. With the super fuel consumption figures we're getting, 17 litres is enough for 425km…reinforcing further that this is a true long range travel bike that will get you to remote places. Add two Coke bottles or a small fuel bladder for the tricky sections and we pass the magical 500km mark with ease. Just like the tank on the Beta the shape of the IMS tank is well thought out, leaving ample room to stand on the pegs and move around. Simply said it doesn't feel like a big tank. They are well made and are strong enough to act as a radiator guard at the same time. The IMS tank is much better in this respect than the Acerbis which doesn't protect the radiator as good. IMS tanks allow for re-fitment of the original plastics, which means you can fit the same sticker kit or any other sticker kit designed for an EXC. Unlike the Acerbis tank, which uses rubber bands (!) to fit the plastics at the front, the IMS tank has threaded inserts so you can bolt the plastics to it in the same way as they do to the OEM tank. Last but not least, and unlike others we have seen, IMS tanks always fit well. We fitted a black one. We know the white translucent ones are easier for checking the amount of fuel left but a white tank on a Black Edition doesn't work, does it? |


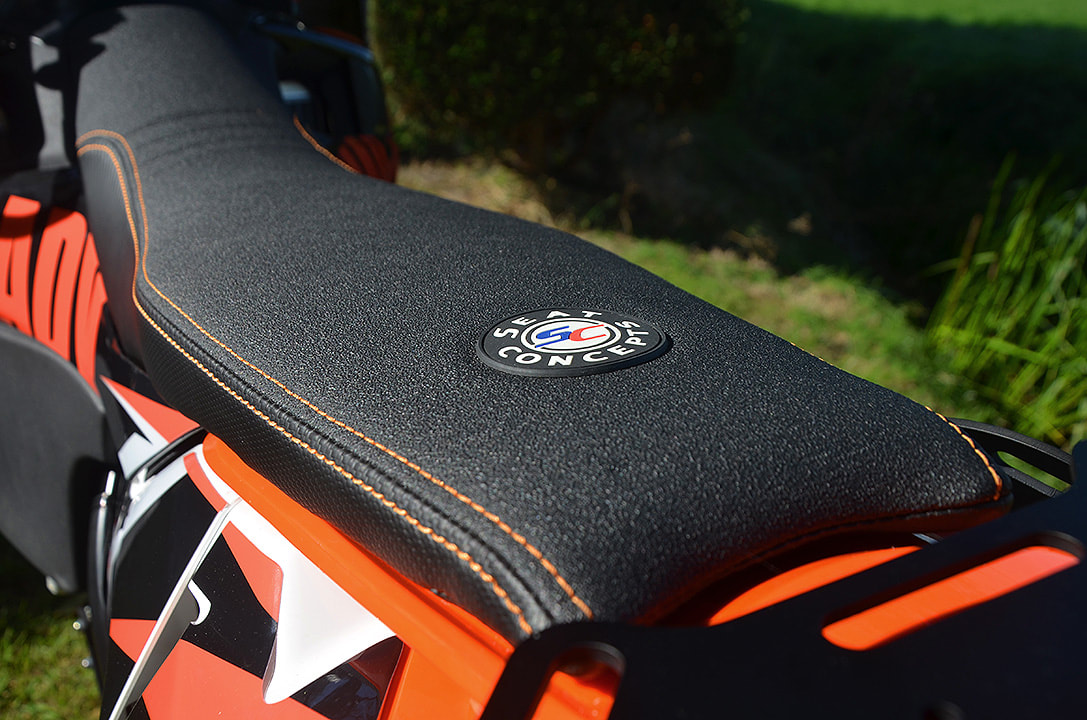
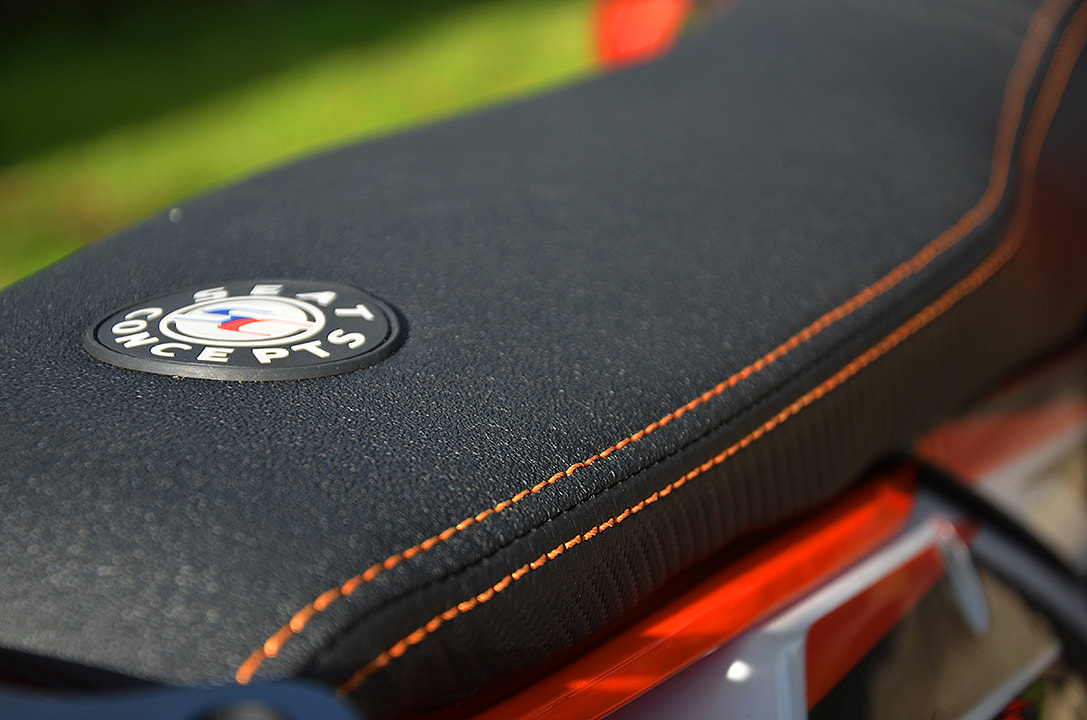
Seat
Just like on the Beta, and 95% of all the bikes we build, we fitted a Seat Concepts seat. There is no comparison, they just work and they work well. They allow 600km stints without a problem. Obviously you have to change position a little now and then after the first 100km but that's easy to do as the seat allows for different seating positions. It's narrow where it needs to be, so you can stand on tricky sections, and wider at the rear. Just like the one fitted to the Beta it's comfort-wise, an absolute must!

|
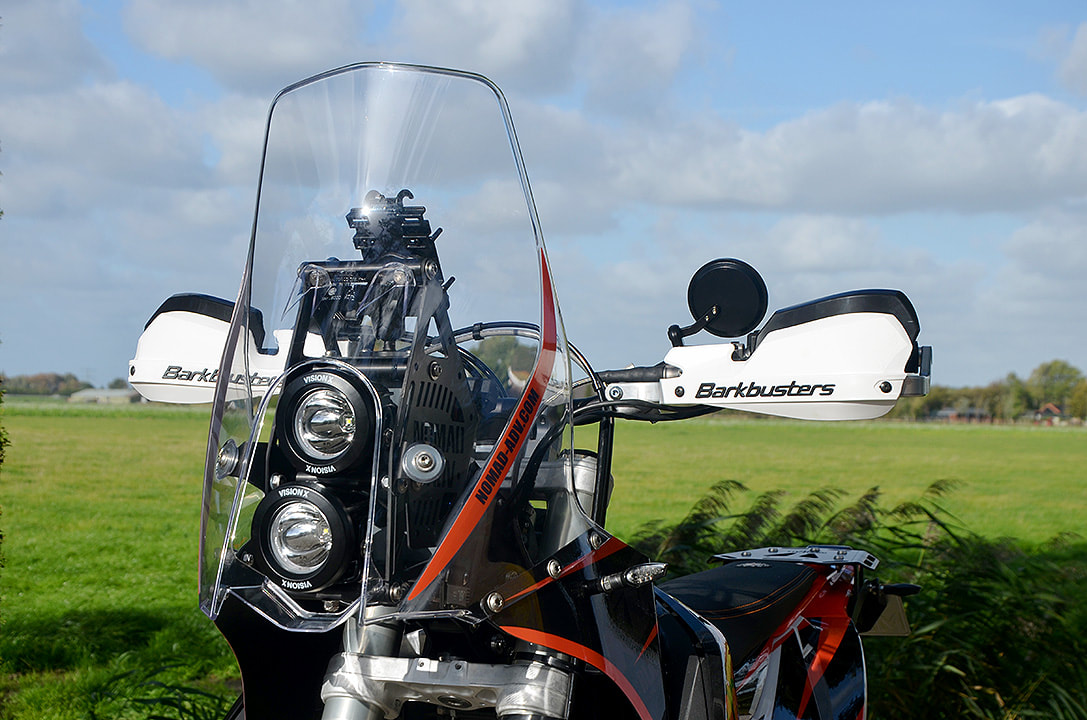
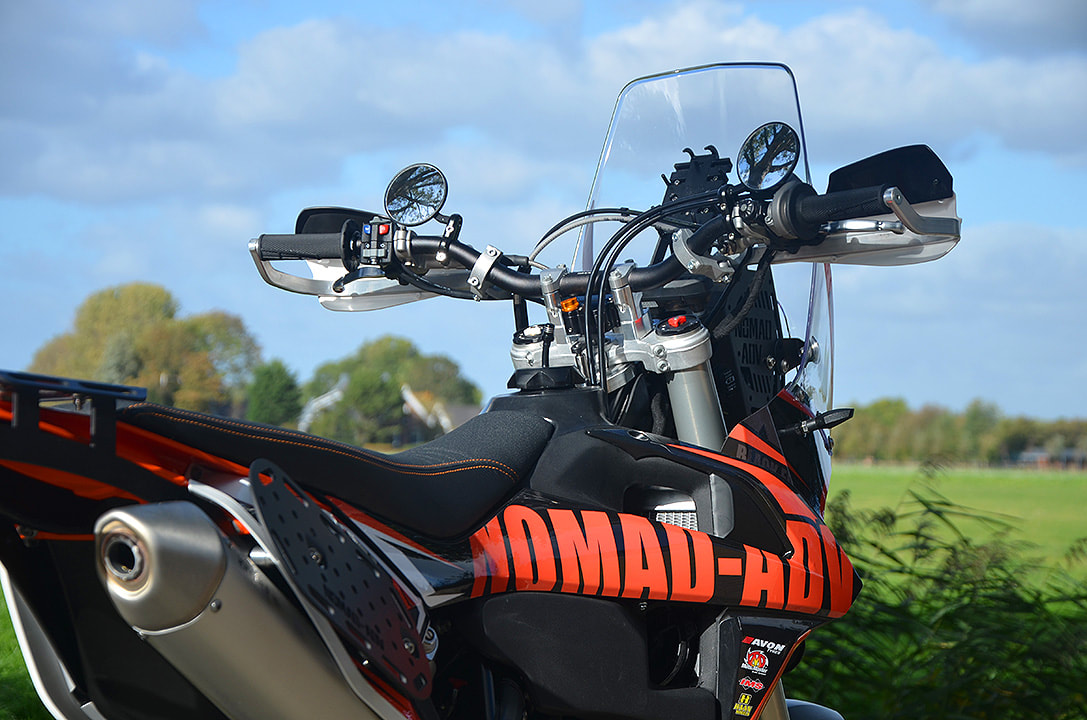
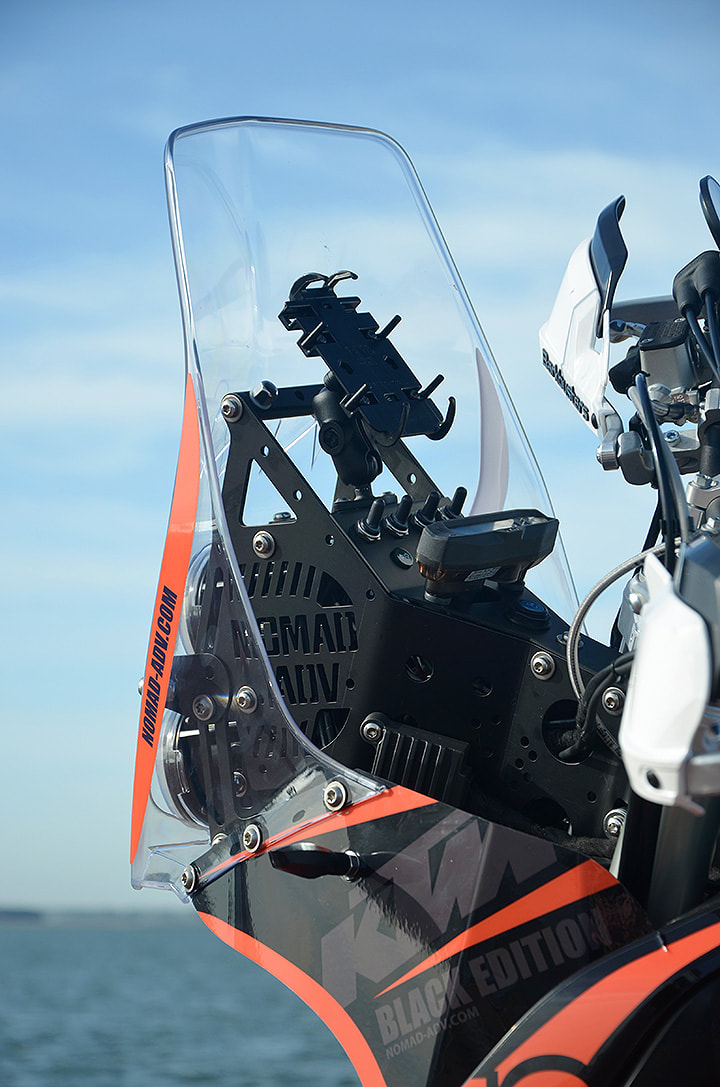
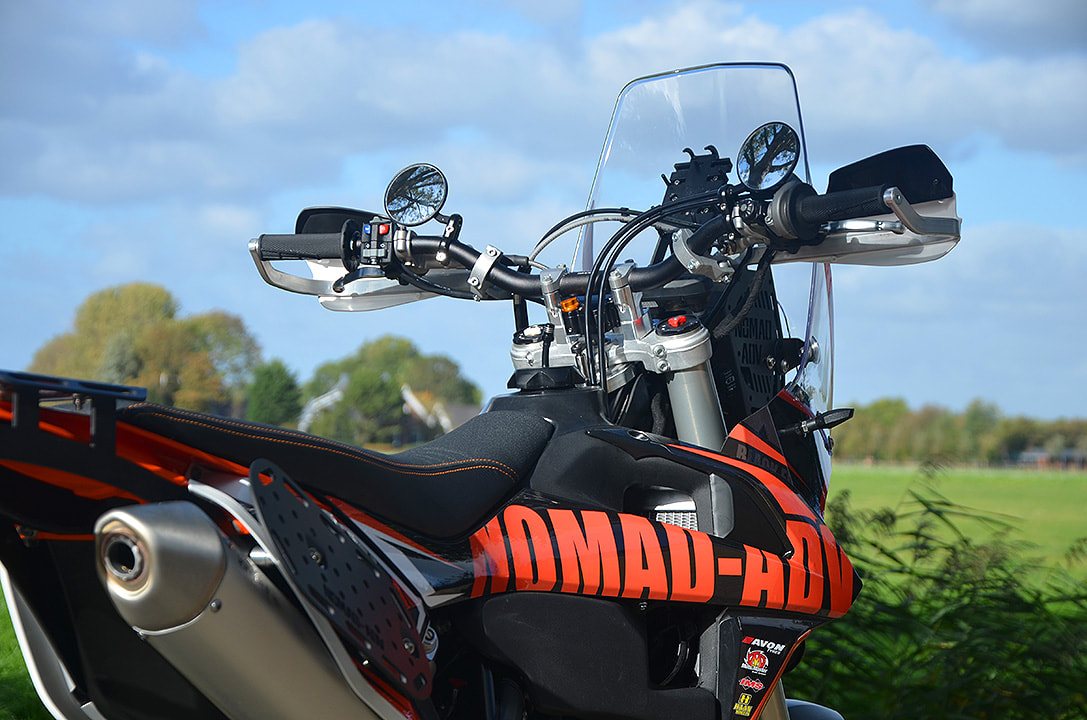
Navigation tower
For longer trips wind protection isn't just handy, it's a must to prevent fatigue. It takes the pressure of my arms and chest, keeps the worst of the rain off for the same reason and increases stability at speed or in windy conditions. The tower is based on the 701 Husqvarna tower we made earlier. It uses the same method of fitment, fully bolted (no welding, cutting or drilling required), but is a completely reworked to fit the EXC frame. So much so that only 4 parts are interchangeable between the Husky and the EXC navigation tower. It accepts the original dash, which is now mounted in a better visible spot than OEM. With the tower come two LED headlights of just 10W each which pump out seriously more light than the OEM one. We can also fit Baja Designs lights which have even more output. On the side is a double USB charging point, one of which is used for my phone that doubles as a GPS and camera, the other to charge a small Li-ion battery which I use to charge my helmet com and phone on non-riding days. The tower can be expanded into a full rally version, but as I'm using it to travel I have not fitted the rally kit and roadbook or tripmeters on this bike. The tower is an all aluminium and bolted construction, anodised in black. The tower has 4 waterproof switches which can be wired up as you see fit. I've used the first one to allow both low and high beam on at the same time as that gives me both the nice wide spread of the dipped beam and the distance view of the high beam. With both on they still use less light than the original bulb. The second switch is for heated grips or gloves which I might fit or wear in the future, the third is to switch my USB points on or off while the 4th one is to manually operate the fan (which is a standard fitment on the 2017- EXCs). Being able to switch the fan on prevents the engine from getting hot when stuck in traffic. The fan comes complete with a thermo-switch which switches the fan on when the engine gets too hot. I'm sure that works but there is so much heat coming from the engine, especially in summer traffic jams, that it becomes uncomfortable to the riders' legs. Switch the fan on and the engine temperature remains the same as it's governed by the thermostat but the riders' legs are no longer barbecued in the process… There are two more advantages of a manual switch: when riding in wet muddy conditions which aren't hot enough for the fan to come on, the fan can become clogged once the mud dries. Switch it on and the fan pushes the wet mud out preventing it clogging up later. We found on cold days it's a great way to warm up your gloves and fingers too :-) We've also fitted an ignition lock with a key in the tower, which means the starter motor won't turn without the key and can't be push started without it either. Barkbusters There isn't much to say about them as fitting them is simply a no-brainer. They protect your hands and levers, strengthen the handlebars, protect your hands from the worst of the weather and are even a handy spot to hang your helmet on… with a small cable type lock. Although it's a Black Edition, I opted for white Barkbuster plastics on grounds of safety. The KTM is a narrow bike, even with the bigger tank, fitting black Barkbusters would make them poorly visible for oncoming traffic. Fitting white ones on the other hand makes it look wider than it is, which results in oncoming traffic giving you more room… |
|
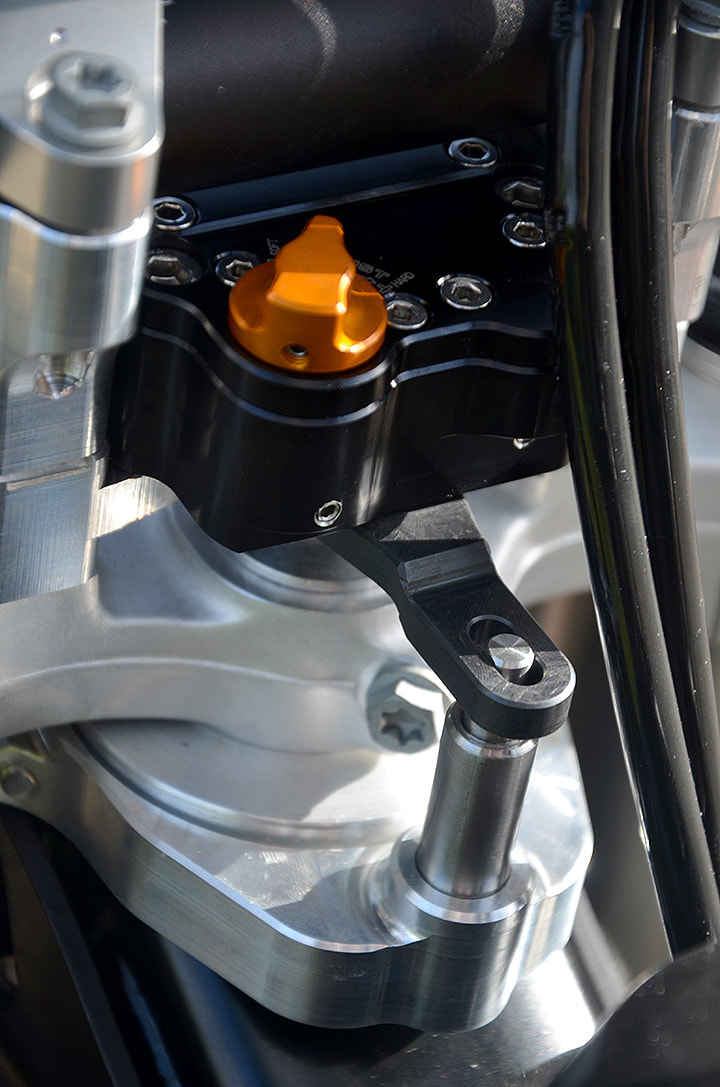
Steering damper
The steering damper is a much misunderstood item, including yours truly until I tried one! They are just as vital to steering as shock absorbers are to suspension. Hit the sand without a steering damper and you're fighting the handlebars which try to whack from side to side and throw you off the bike. Fit a steering damper and it steers true… it's that simple. They do the same when crossing a rocky river bed or riding a loose gravel road. In cross winds they also stabilise the bike and they also keep the bike beautifully stable at highway speeds. Once you've tried one you'll probably wonder why you haven't fitted one earlier… I sure did! We used an MSCMoto one, developed for harsh races like the Finke. They are probably the toughest ones around, perform better than any other in my humble opinion, are very simple to adjust while riding and yet have over 20 clicks adjustment options to set it exactly as you prefer it. Under the skin…
There are several modifications which aren't directly visible but make a big difference. I've added a Tutoro chain oiler, which drips on the lower chain run just after the front sprocket. It works well, does make a bit of a mess when used over long distances at times but as it's oil rather than grease it cleans up easily enough. I don't use the supplied nozzle but prefer to let it drip straight out of the hose. As the hose is flexible it won't get damaged by a flicking up chain like the nozzle would while dripping just behind the front sprocket rather than onto the rear one means there's nothing to get damaged by rocks and stuff. I've set mine up for mineral gearbox oil, which is available everywhere and works well without damaging the seals. The big ugly OEM mirrors have been replaced with small ones. I fitted them above the handlebars in order to see over my top bag. At the rear we fitted a second rear light as an extra stoplight. The original KTM one isn't bad but the second light is very bright and will grab the attention from the zombie car driver behind you who's more than likely on the phone and checking his e-mail at the same time… Small LED indicators replaced the OEM ones as they are smaller. |
|

|
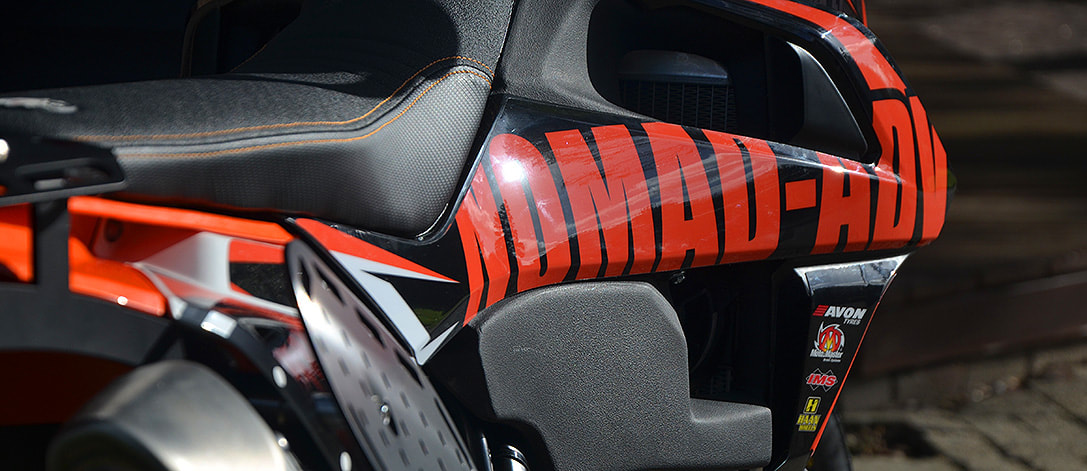
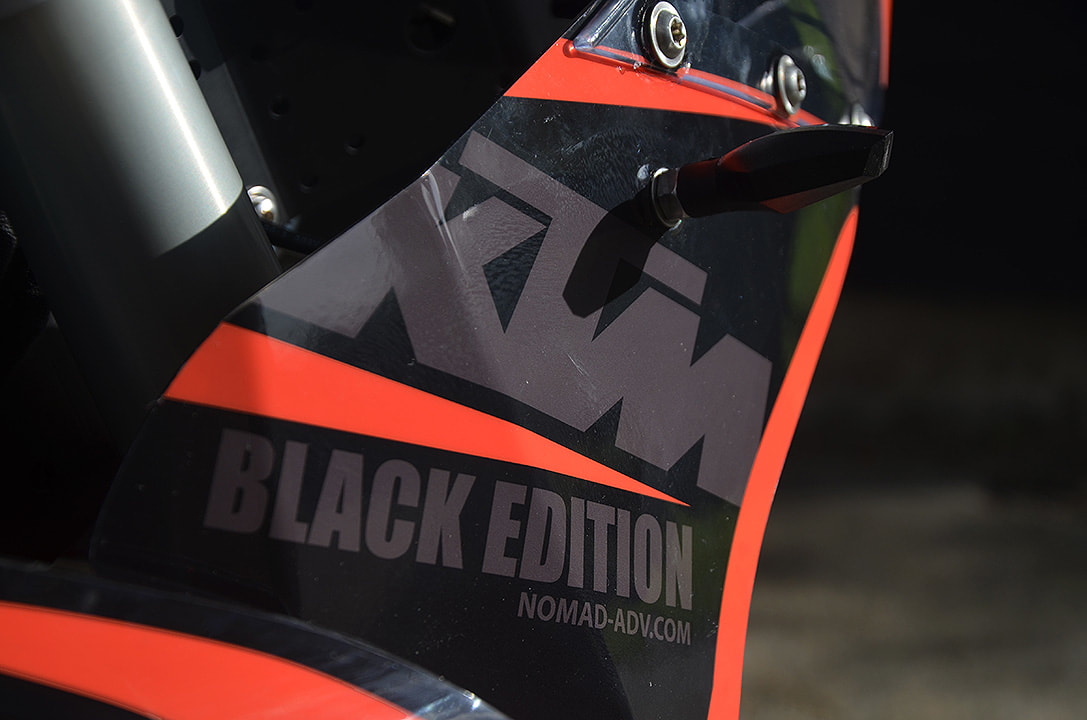
The sticker kit…
Believe it or not, the sticker kit took us a long time to make. They are a vital part in how the finished bike looks. We have them printed on a very high gloss and strong sticker material by a specialist supplier. We feel it enhances the looks even further. |
|

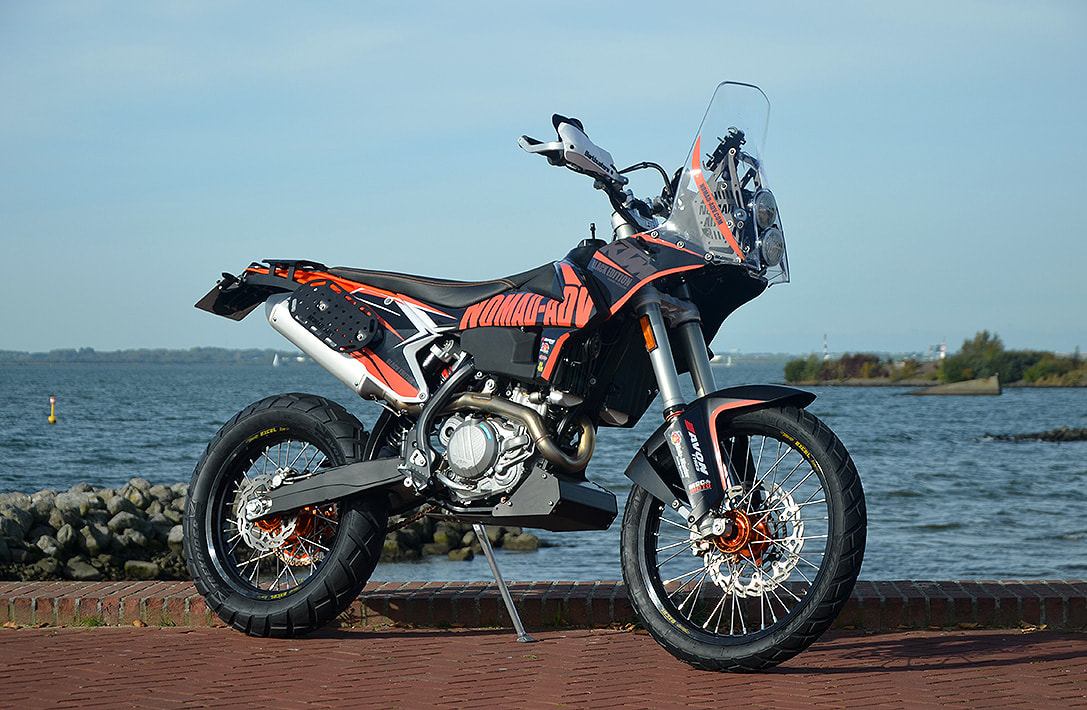
Bottom line
All in all quite a few changes but each and everyone of them made the bike better. What started as an enduro frame with an engine is now transformed into a long range lightweight travel bike which is a joy to ride both on-road and off. Every time I take it out I have a grin on my face and would love nothing better than start another around the world trip on it tomorrow...
All in all quite a few changes but each and everyone of them made the bike better. What started as an enduro frame with an engine is now transformed into a long range lightweight travel bike which is a joy to ride both on-road and off. Every time I take it out I have a grin on my face and would love nothing better than start another around the world trip on it tomorrow...