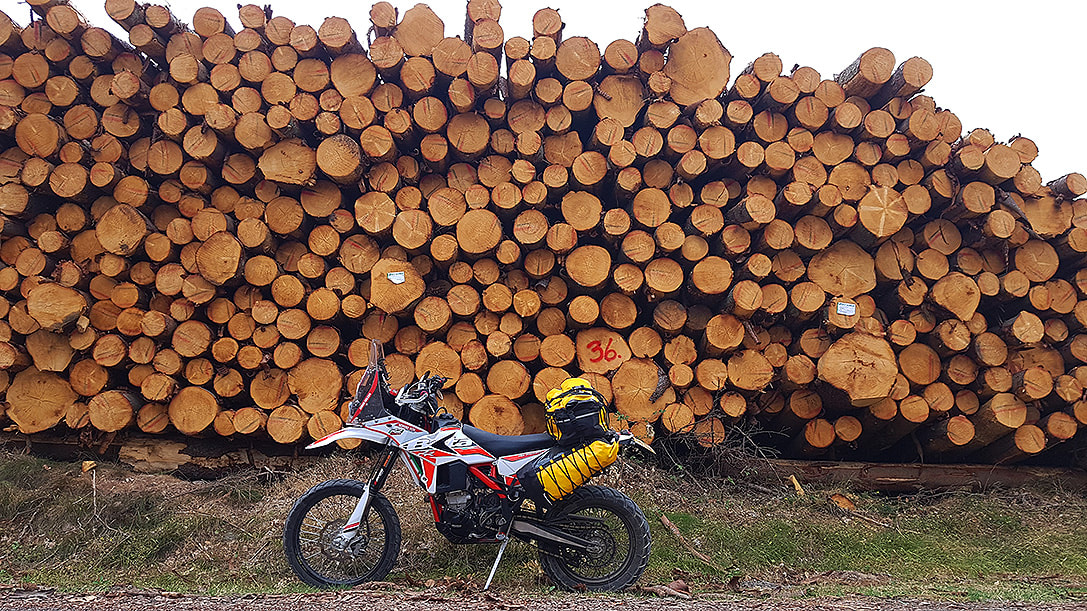
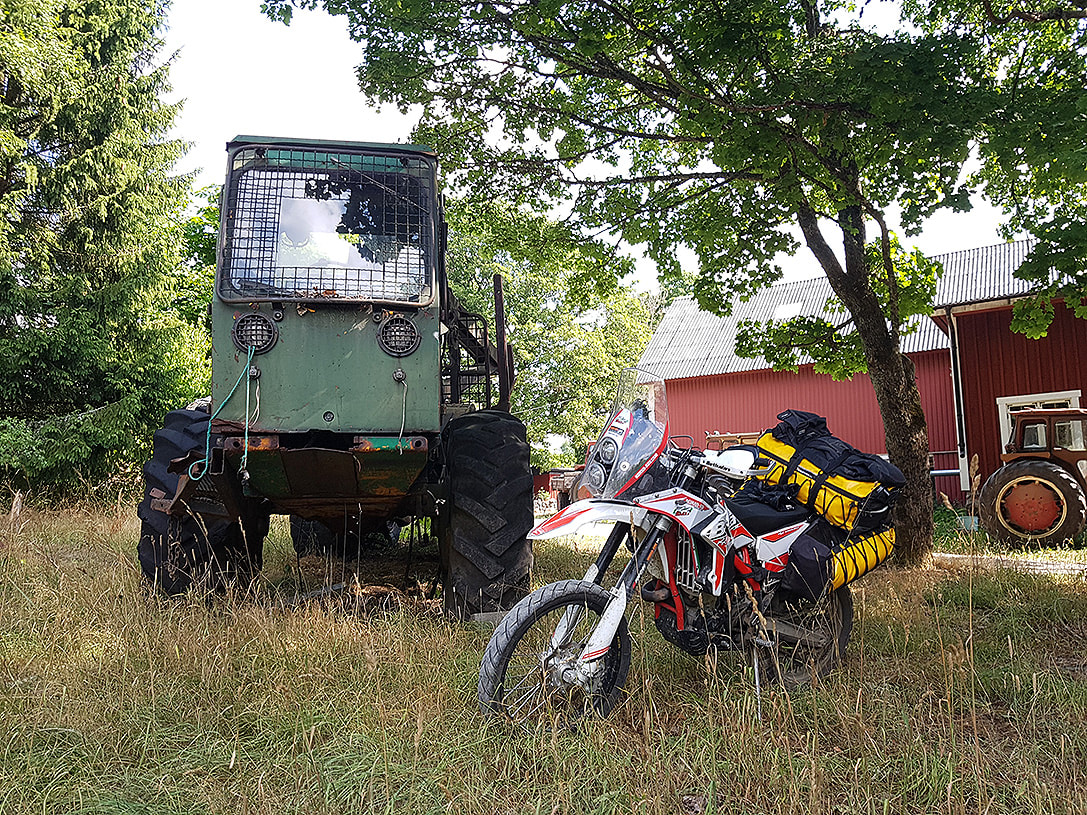
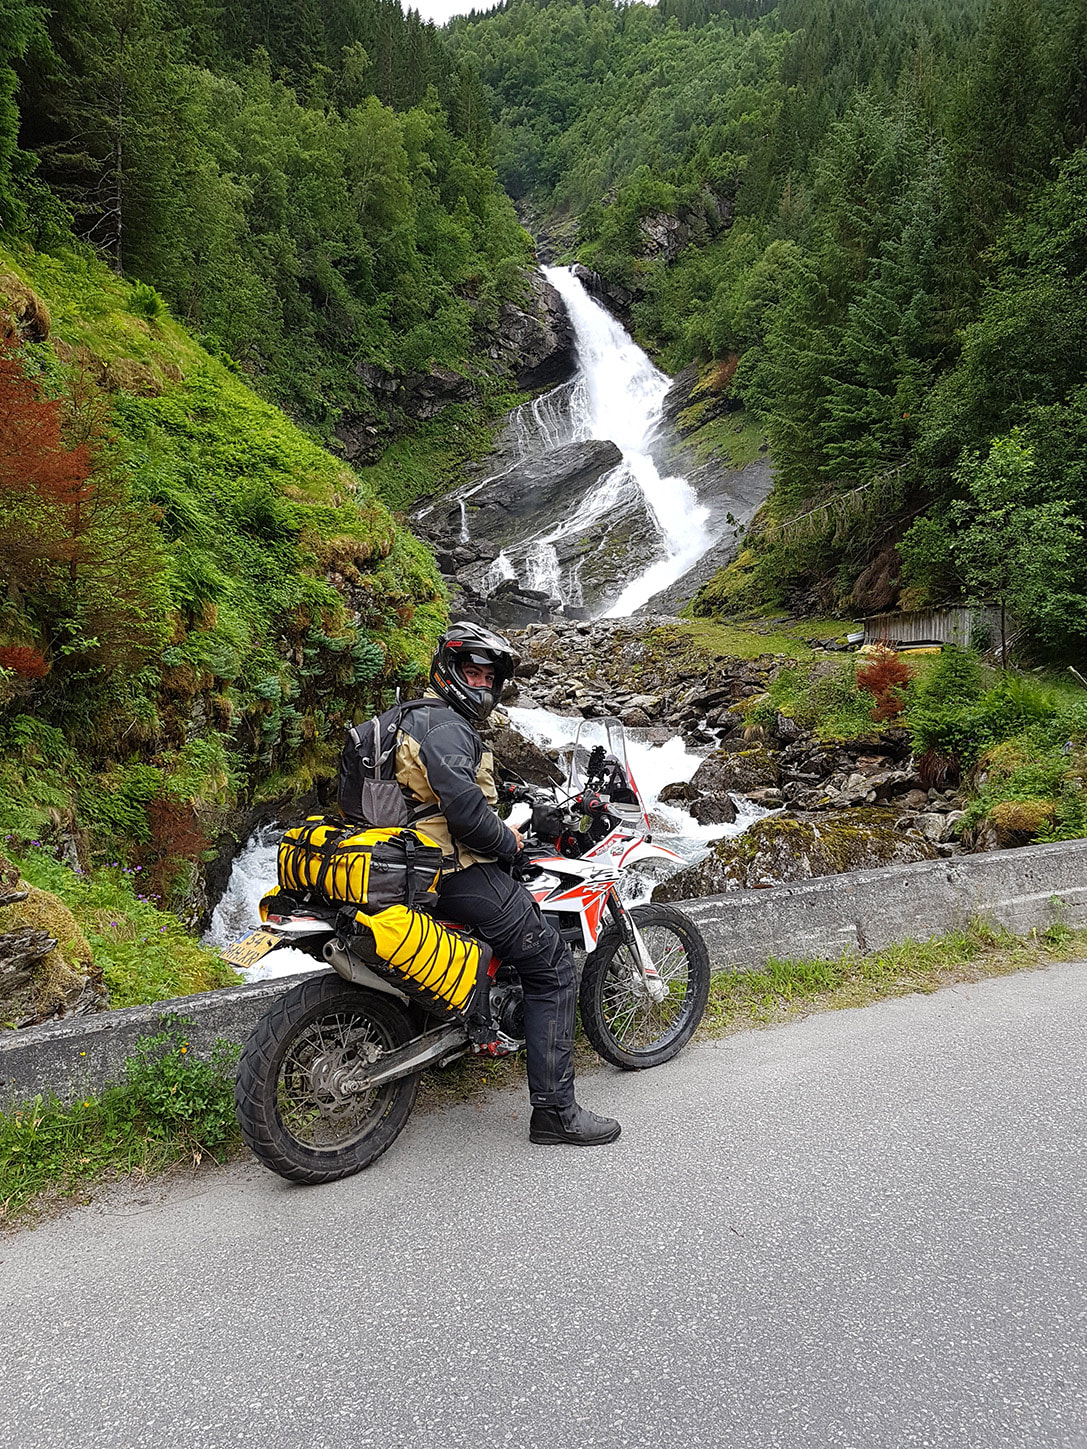
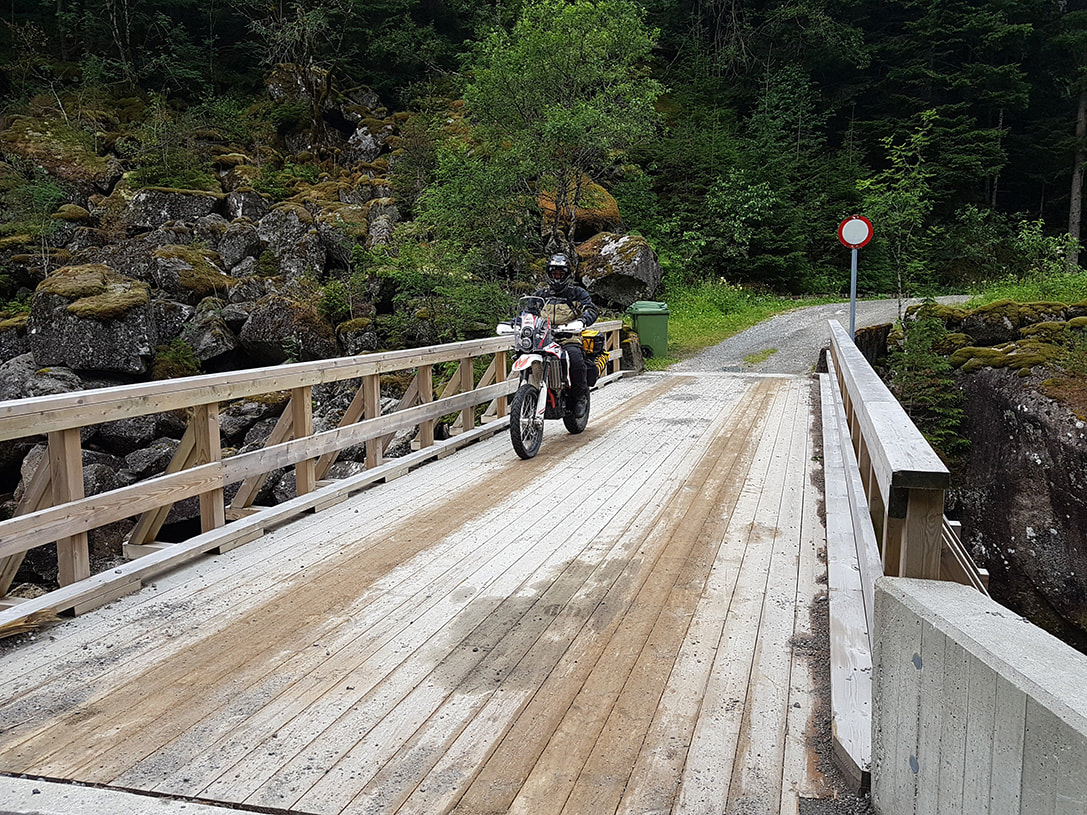
The Beta 480RR Nomad
Unlike the KTM EXC and Husqvarna FE range, the Beta was pretty much unknown territory for us. Still, we liked the look of it and saw its potential as a light weight long range travel bike. We thus bought one, one of the very first 2018 models in fact, and took it on a trip to the UK in unmodified form to test its strengths and weaknesses, get a feel for the bike and to work out what we wanted to change and why. It was to become my (Mike) personal bike too. That first trip was 4,000km, done with the stock 'seat' and the standard fuel tank…

|
We had fitted Haan Wheels with a cushdrive, as we don't ride without them, and had specified KTM hubs to allow for KTM discs and sprockets as they are widely available. The Beta sprockets have a slightly different bolt pattern to KTM, not a smart move we feel as there simply aren't that many Beta dealers in the world.
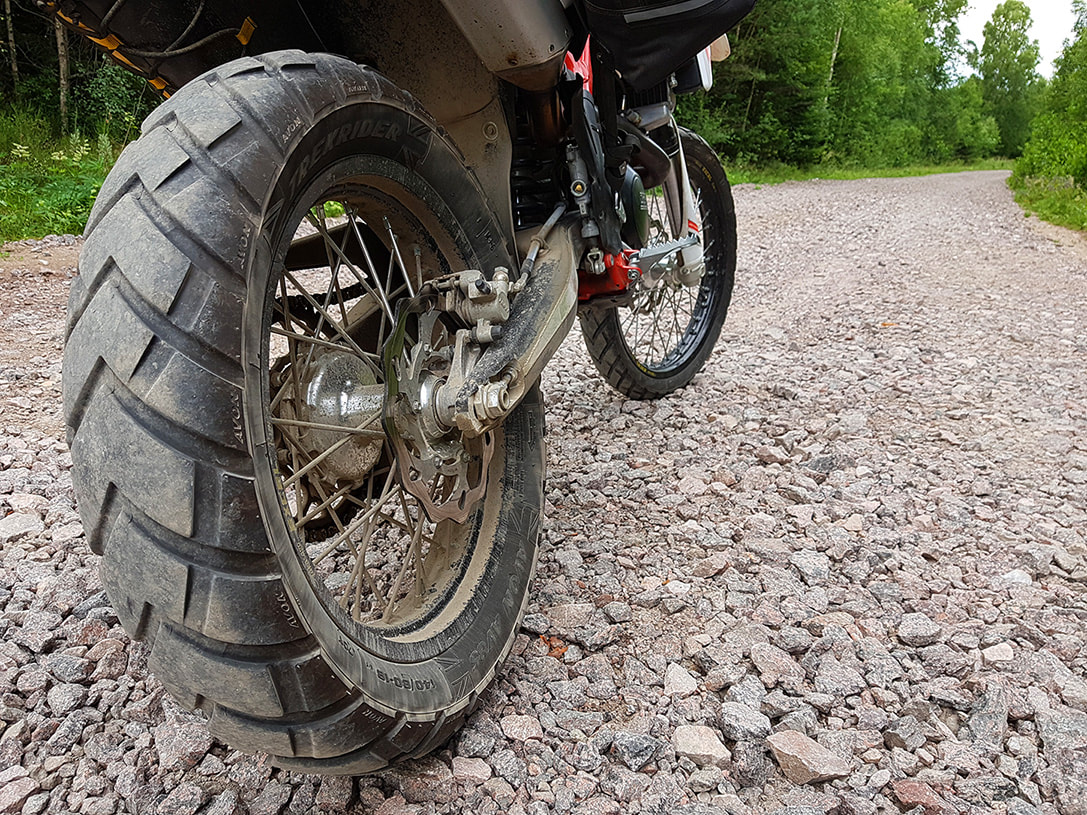
To make the KTM hubs fit the Beta swingarm, and ensure perfect wheel alignment, we made new wheel spacers. While it has been stated elsewhere that you'd only need to trim down one spacer, that would put the wheel alignment out. We also specified slightly wider rims than standard on an enduro to allow for a wide range of dual sport tyres. We fitted Avon TrekRiders to it, a 50/50 tyre but apart from that it was totally as it left the factory for it's first longer run. |
It wasn't to be a problem-free test run, as we were about to discover. In fact the first problem already manifested itself before we had even left… a short circuit in the wiring… after all these years Italians and wiring still don't seem to mix somehow :-)
Unfortunately it was a forbore of things to come too, more on which later… The second problem was the noise it makes! Despite being totally standard, including the exhaust, the noise is truly deafening. Not fun on long days, unless you like a headache that is. Shortly after, about 40 km in fact, the second problem became clear: a seriously bad original seat, which in all fairness was never designed for long distances and is a problem with every enduro, but on the Beta it's particularly bad.
|
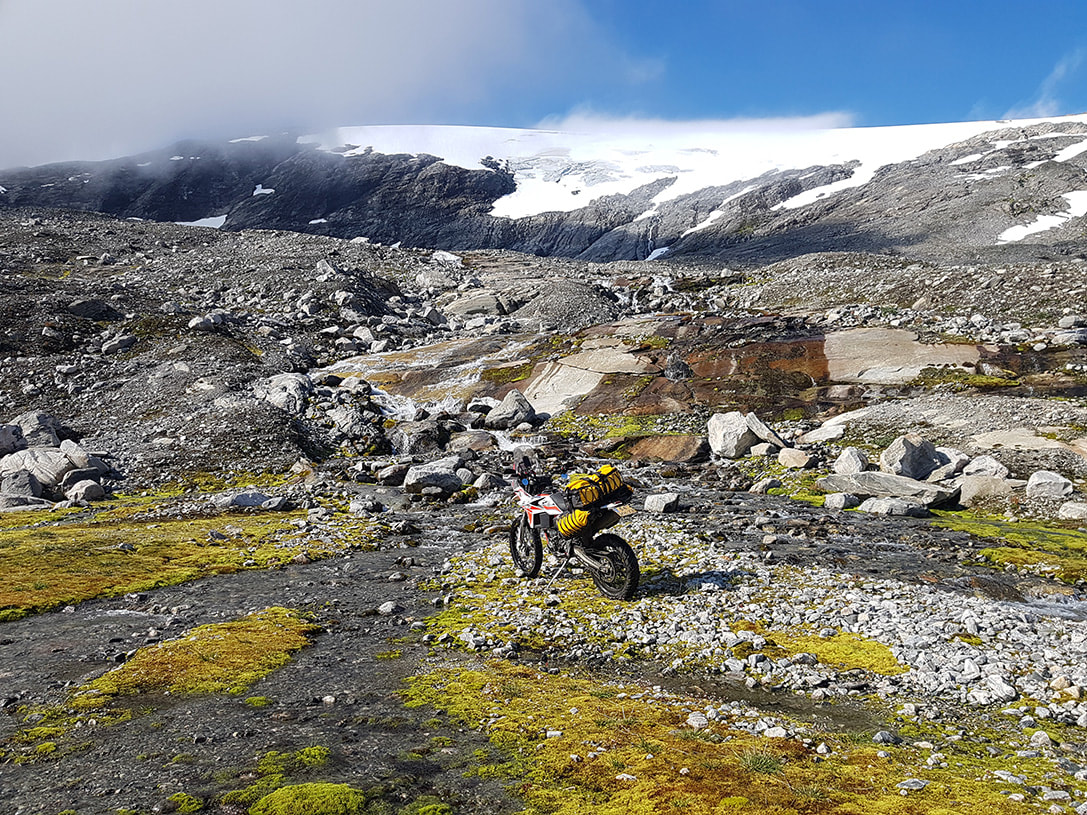
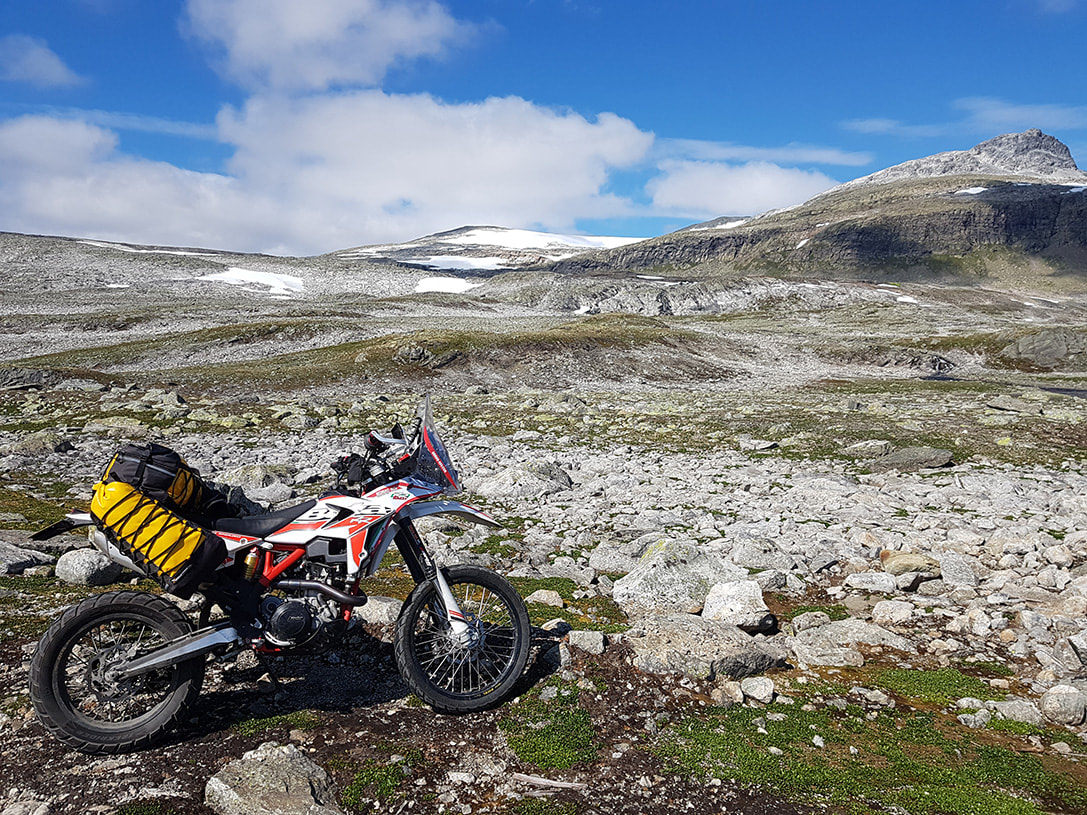
Back from that 'get a feel for the bike' trip we set to work. We knew what needed changing to convert it into a travel bike, and how. The first version of the navigation tower was made early September 2017, a fully bolt-on tower based on the 701 design, although only 4 parts are the same as the 701 version. Further testing revealed that we needed to make changes to the geometry, we thus made a second prototype, tested it and finalised the design. It was in theory ready for production. The next step would have been machining the jigs but before we could start on it we got snowed under in work! So much so that it was 7 days a week flat out. As the Beta is our own bike, customer bikes always come first and the poor Beta moved further and further towards the back of the workshop. In the end we went on holiday in 2018 with the same second prototype tower as we still hadn't found the time to put it in production. We thus put another 8000 test kilometres on it over the Swedish and Norwegian TET route alone, on a tower which had already been exhaustively tested…
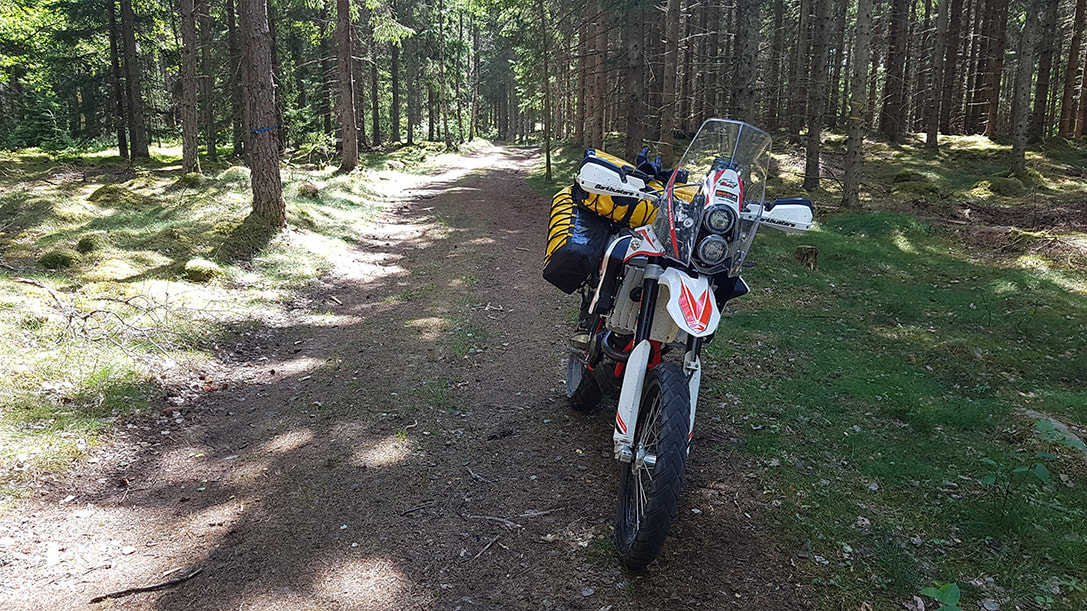
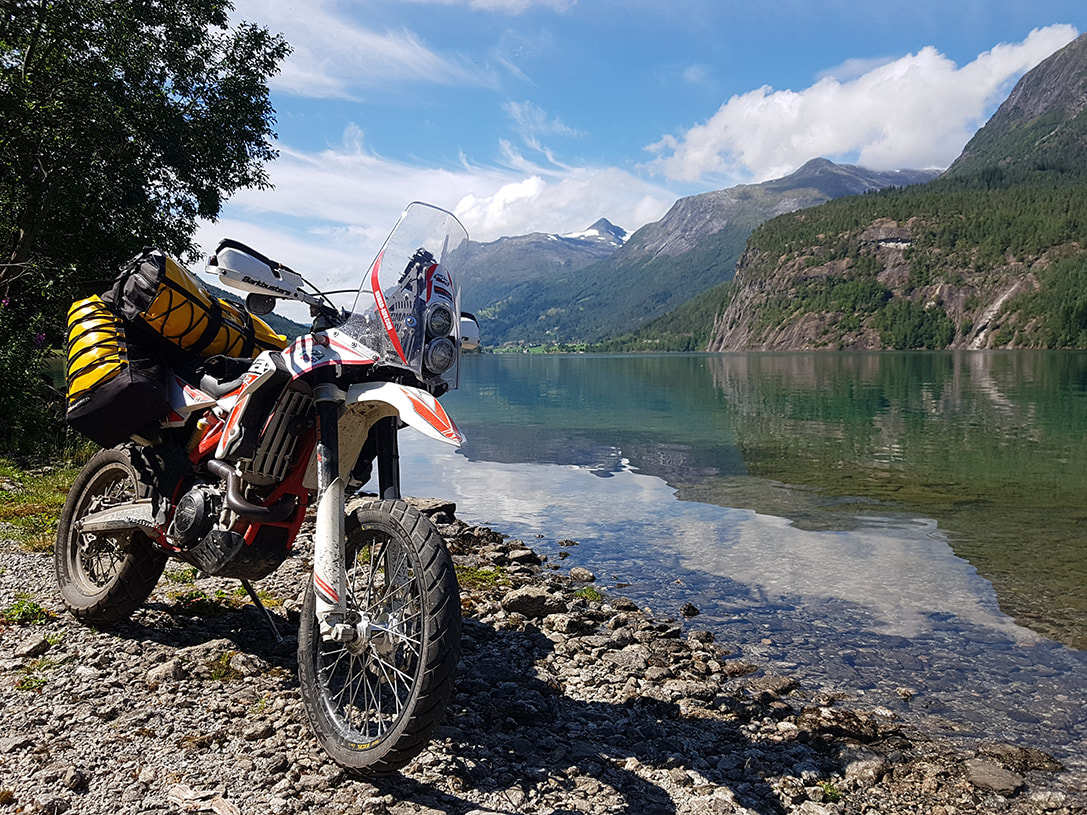
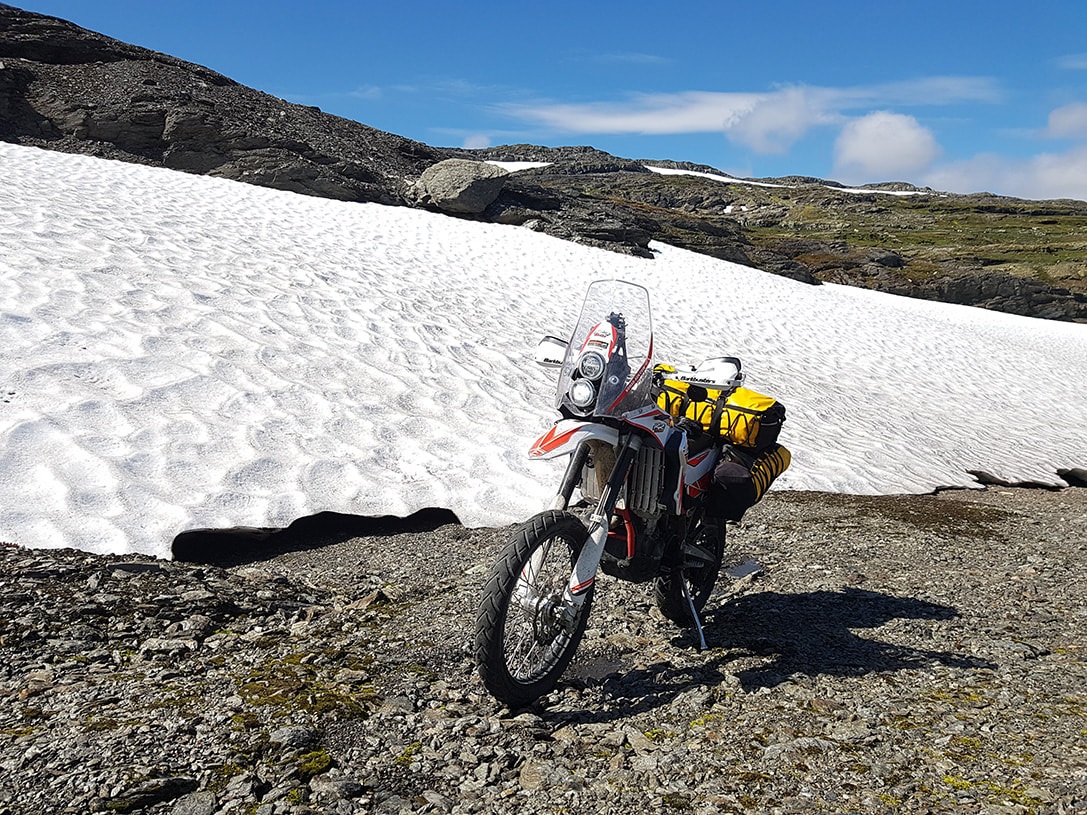
What did we change to the original Beta 480RR? The changes we made are for travelling purpose. To allow travelling over long distances, increase comfort, allow for luggage, charge our phone and small battery pack. They are aimed and increased usability. You'll notice we have not made any performance improvements as the engine performance is fine as it is for what we do. Increasing performance shortens service intervals, increases fuel consumption and reduces the mileage we can expect from the engine. All of which we don't want on a long range travel bike. Some modifications have found its way into the rally world too, such as the navigation tower as the wind protection offered is a bonus there too while it can also accommodate for the ancillary rally equipment such as a roadbook, trip meters and iritrack. We've listed the changes and the reasons why below, we'll start at the bottom and work our way up. |
|
|
Wheels
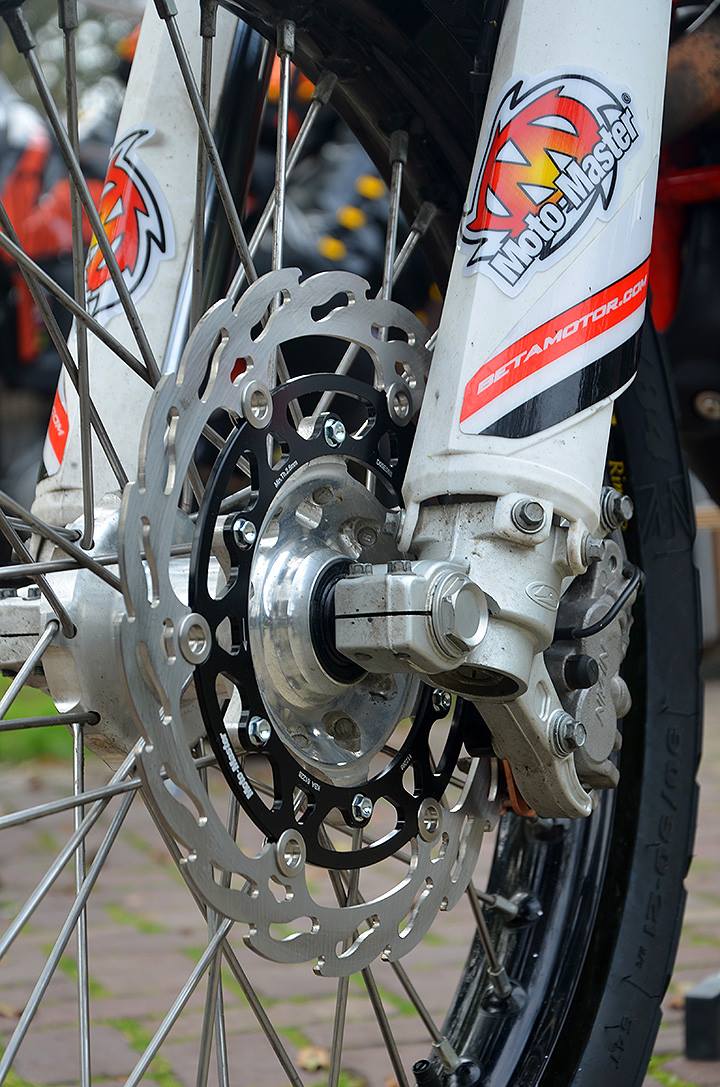
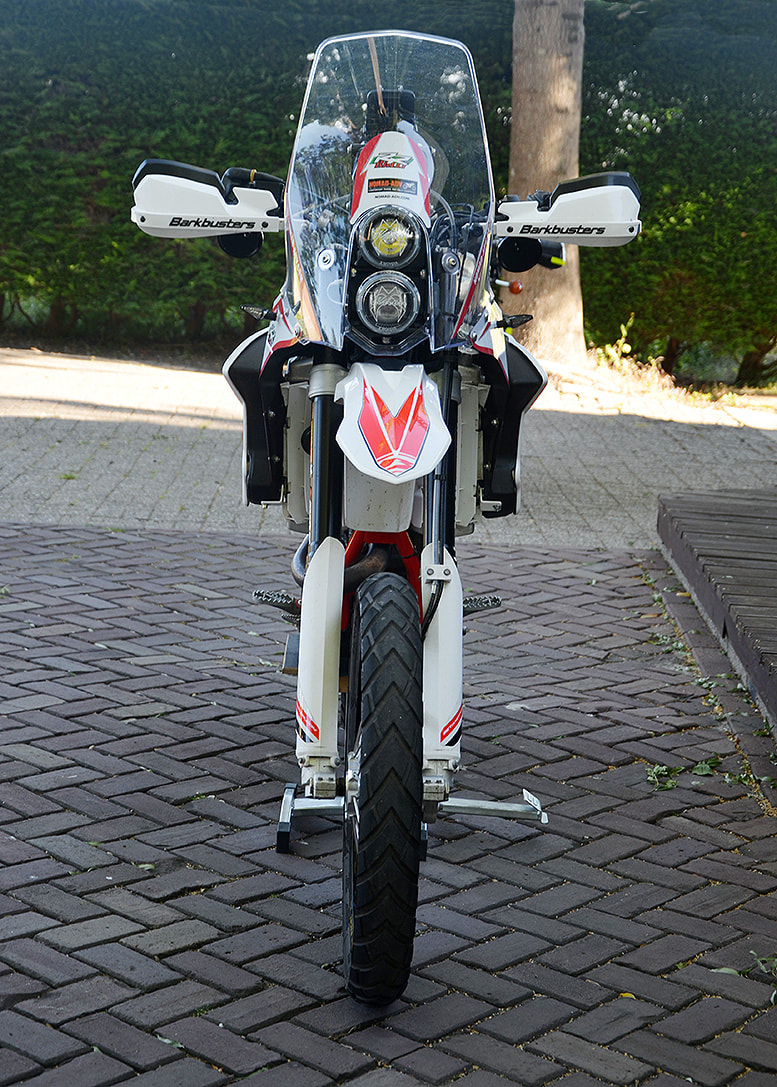
As already mentioned we changed the wheels for Haan ones. The original wheels don't come with a cush drive hub. A cush drive hub is one where there is a shock absorber fitted inside the hub between it and the rear sprocket. It acts as a cushion in the drive chain, hence cush drive. It smooths out pulses generated by the big single engine, makes the gearchanges smoother and dampens any sudden load changes on the final drive. On a wheel with a rigid mounted sprocket the ride is harsher and load changes and pulses tend to damage the splines on the output shaft. The Haan Wheels are a lot stronger than OEM as they use billet machined hubs, heavier gauge stainless spokes and Excel rims. We fitted wider Excel rims than OEM to allow for a wider choice in dual sport tyres. At the front we fitted a 2.15" and a 3" at the rear. As stated above the hubs we used are for a KTM EXC, which means we can use KTM rear sprockets (which are slightly different than the Beta). We machined new spacers for it as, unlike what has been stated elsewhere, it's not just a matter of cutting down one spacer if you want a proper wheel alignment. Tyres Knobblies or knobbly derived tyres might give good grip in loose off-road stuff but they are horrible things on the road. Their roadholding on asphalt is very poor, they are unstable at speed and are worn out before the engine has been properly run-in. That's not intended as negative towards knobblies, it's simply using the wrong type of tyre for the job. We try to find as much off-road as we can but there is no denying that in Europe and most other parts of the world we simply have to cover large distances over asphalt roads to get to the off-road or gravel roads. A 50/50 tyre is therefore our choice and we feel the Avon TrekRider is the best of the lot. Being made in the UK, where it often rains cats and dogs and single digit temperatures are described as 'a nice fresh day…(!)' you would expect good roadholding in wet and cold conditions from Avon Tyres, and they do. We also used them in 48°C in Kazakhstan on the road from hell, they shined there too (literally because of tarmac so hot that it melted to my boot!) They don't have a knobbly type thread pattern, which means non of the noise and vibration issues associated with knobblies and a perfectly smooth ride on the road. Off-road their V-shaped pattern means they push mud and loose stuff to the side, just like a tractor tyre if you like. It works very well and makes the bike stable on muddy roads or tracks. Just like the Avon TrailRiders, which we have used on our trip around the world, they last a long time too. Not as long as the TrailRider as the TrekRider uses a softer compound which not only helps in ensuring more grip bit also helps clearing mud from the threads. We still got 14,000km out of a set though. We don't use rim locks as the Avon tyres we use don't need them. On our trip around the world we used Avon Distanzias and TrailRiders for over 120,000 km, had several flat tyres due to nails, thick cactus needles(!) and stray fencing wire and even had to ride on with a flat front for 120km at some stage without the tyre coming off the rim. On the Beta we used tyre pressures as low as 12psi at the front without any issues (except higher tyre wear) to counter the poor fork action over small ripples. Brakes We found the original brakes very grabby and yet give limited braking power. They overheated quite quickly too when used on mountain roads. We fitted an oversized one from MotoMaster at the front and simply a better one from the same brand at the rear. Why MotoMaster? Because they are as far as we're aware the only ones offering wave discs where the pattern is computer calculated to ensure the same brake pad contact area all around the disc. MotoMasters are fitted to the KTM Factory Dakar bikes, the ones that have won the Dakar for umpteen times in a row. To be even allowed to supply them to an all winning race team means they have to be very good. |
|
The same pad/disc combination is available to mere mortals like us too and while we're not racing, they offer us brakes which are not just much better but are also much less prone to overheating when used in anger while being more controllable too.
Suspension The new fork is so stiff that small ripples such as frost damage are hammered through to the handlebars. Even the small expansion gaps found in concrete roads feel like a hammer hitting a nail in the handlebars. Apparently riders have complained that the previous OEM Beta front forks were too soft. For the 2018 model Beta has therefor fitted a stiffer one… and have gone the other way now. We've increased the air gap back to the setting as used on the previous forks, which does help a little but doesn't cure it. Quite honestly we feel the air gap as used on the 2018 models is too small and can lead to an hydraulic lock (or close to it) when the suspension is used to the full. A feeling reinforced by a fork seal blowing as soon as we hit the first off-road section... The rear Sachs shock is much maligned on the web but to be fair to it, it actually works quite well. We fitted a heavier spring to it to compensate for a heavier rider and 20kg of luggage but left the damping alone as it works fine. |
|
We've used it for 17,000 km at the time of writing and so far the shock is performing well without any issues. The shaft looks like new too. At the front more work is needed. Fitting the navigation tower, which ads a little weight to the forks actually helped but more work is needed. It might be cured by fitting a different type of fork seal but we suspect a re-valve is needed... once we have a bit of time for it we'll investigate further.
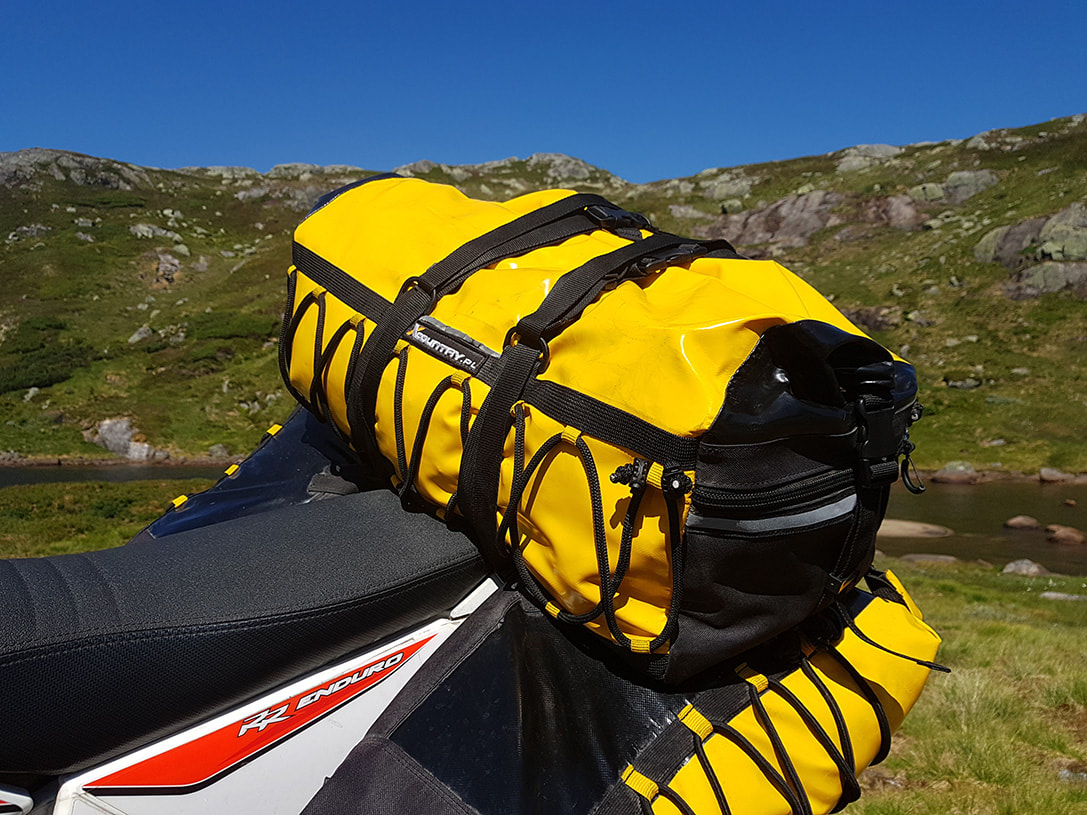
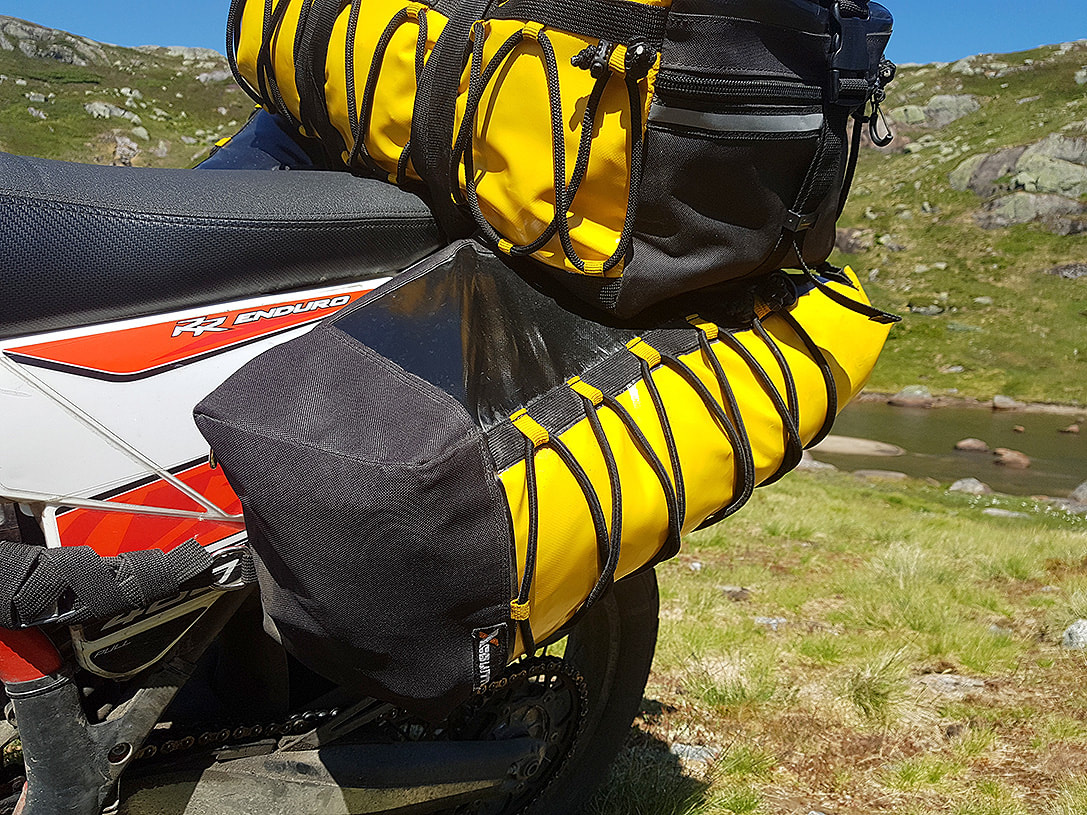
Luggage
The rear part of the Beta rear subframe is prone to cracking, especially when fitted with a certain after market luggage rack which requires drilling in the weakest part of it(!) let alone another one which 'hangs' on two bolts only intended to hold one plastic part to the other.
Luggage
The rear part of the Beta rear subframe is prone to cracking, especially when fitted with a certain after market luggage rack which requires drilling in the weakest part of it(!) let alone another one which 'hangs' on two bolts only intended to hold one plastic part to the other.
|
|
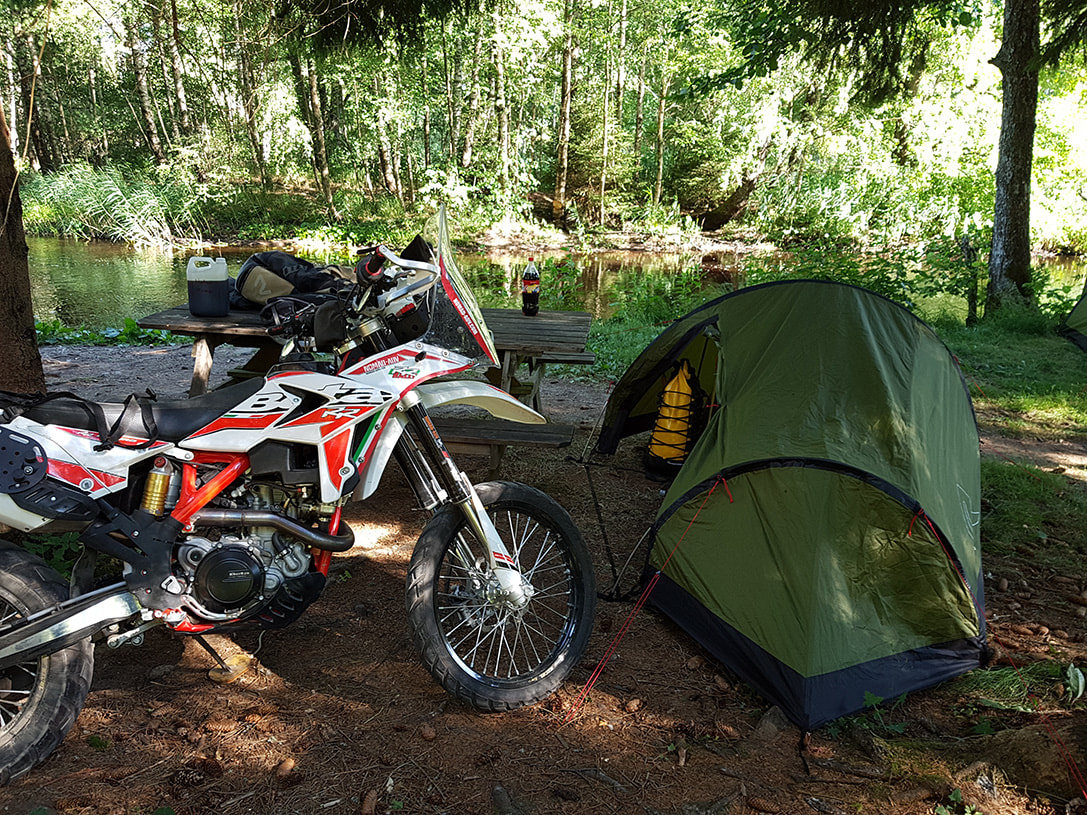
We've therefor made an aluminium luggage rack for it which in effect has it's own subframe. Fitted to the exhaust mounting points at the right hand side and three different locations on the other. It strengthens the rear section of the subframe rather than putting more strain on it. We used it for 15,000 km with 20kg of luggage on it, divided over two side bags and one top bag. We try to keep the weight as low as possible and thus the top bag light at 8 kg. There are people who claim they don't need a rack… they will keep saying that until they've tried a properly designed and made rack as it makes life so much easier. Fitting the soft bags in the morning is 5 minutes tops, and they don't move during the day, don't damage the plastics and don't get burned on the exhaust… which brings me to the next change:
|


|
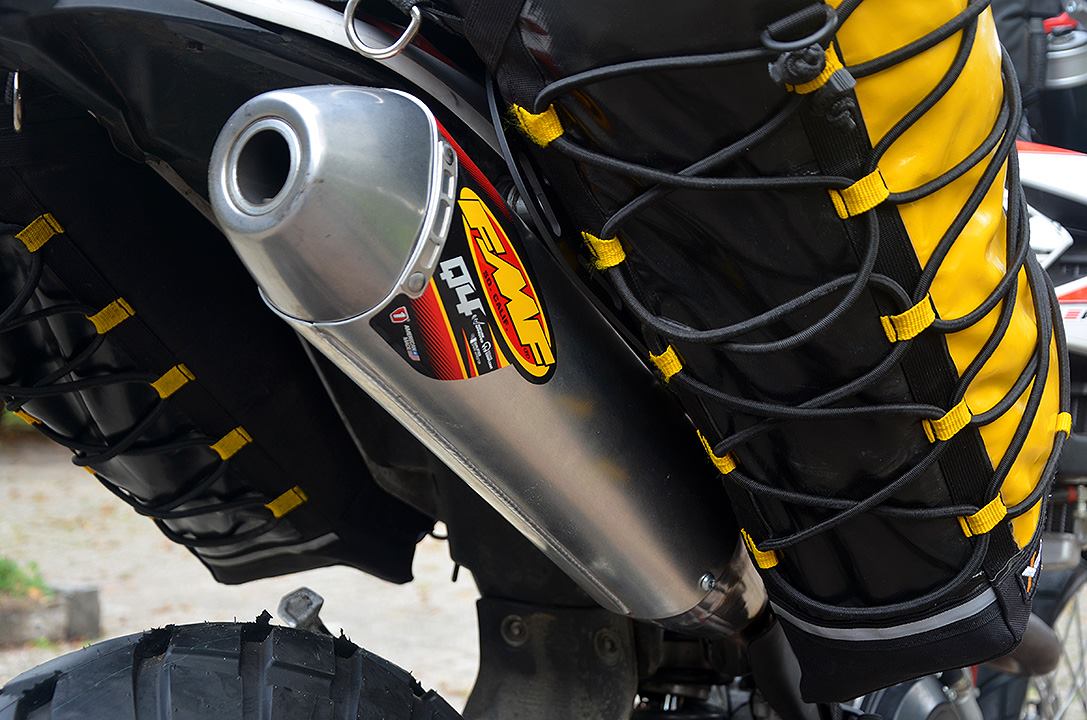
Exhaust
Most of us fit an aftermarket exhaust to either increase performance, or engine sound or both. We didn't. We replaced the OEM exhaust for just two reasons: the original one is way too loud, as in ridiculous and deafening on long runs, and it gets very hot. So hot in fact that even with the rack fitted we needed an insulator to prevent the bags from melting! The noise it makes is much more than a KTM EXC. I have no idea how they ever got it through the inspection... it's that loud. Not only does it give you a headache on long runs, it's also a sure way to get your bike grounded in a police roadside check. A quick chat to an experienced Beta supplier learned that there wasn't much that could be done about it. Re-packing would help a tiny bit but not much in their experience, the only option was an after market muffler. The first time I ever replaced an OEM exhaust for an aftermarket one to make it a bit more quiet... |
|
We kept the original header pipe but fitted an FMF Q4 to it. The Q stands for quiet. It's not a strangler, the Beta actually runs better with the FMF and it emits a deeper sound. The sharp ear shattering rasp from the OEM exhaust is gone though, especially so when riding through narrow streets with the sound bouncing off the walls. The temperature difference is massive too, still too hot to hang a bag over obviously but the luggage rack stays cool now!
Fuel tank
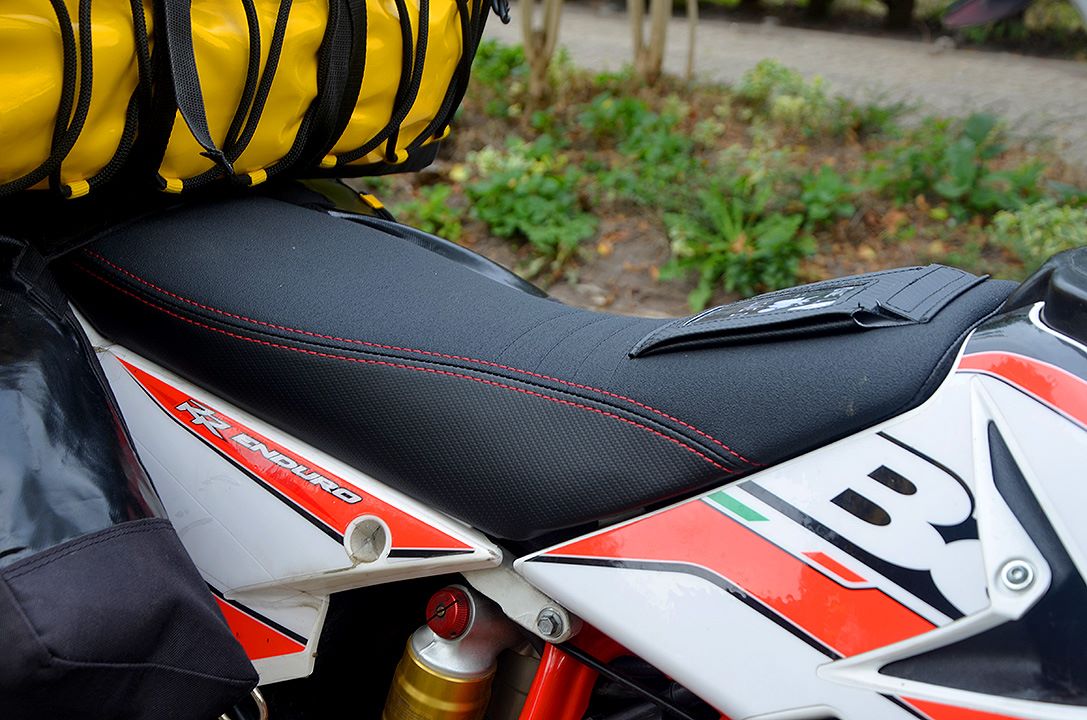
To allow for longer distances we fitted a bigger tank. The original tank is simply too small to get from pump to pump, even in Europe. We chose the 15 litre IMS tank for several reasons. Their shape is well thought out leaving ample room to stand on the pegs and move around, they are well made and are strong enough to act as a radiator guard at the same time. IMS tanks allow for re-fitment of the original plastics, which means you can fit the same sticker kit or any other sticker kit designed for a Beta. Last but not least, and unlike others we have seen, IMS tanks always fit well. One thing to remember is that as space is particularly restricted on the Beta, IMS had to make the tank slightly wider at the top to get to 15 litres. It's not a problem or something you'll notice when riding, it really is a well thought out shape, but it does require a slightly wider seat at the front to bridge the gap between the OEM plastic panels. Seat Concepts have a comfort seat for the IMS, and you definitely want a Seat Concepts seat anyway… (just remember to order the right one).
To be honest the fuel consumption of the Beta is a bit of a disappointment. Where the EXC returns a consistent 25-26km/ltr the Beta hovers around the 18-20 km/ltr on the same trips... We rode side by side, so the figures are comparable. Despite using more fuel, the Beta has less power too. We did a short rolling start acceleration test and found the Beta could keep up until second gear... and then the EXC left it for dead.
|
Seat
I'm not sure how to describe the OEM seat without sounding negative… it's that bad. Seriously. It's been described by others as a 2x4" but we feel that's unfair to the tree that supplied the wood for the 2x4". We thus fitted a Seat Concepts seat, like we do on the EXCs and FEs too. The original became painful after just 40km, painful to the point where we started wondering about certain body parts being rendered unfit for marriage…! With the Seat Concepts I rode 600km highway days with only a slight discomfort. After about 100km I just started feeling it a little bit, but as the seat allows for different seating positions it was easy just to shift my behind a little and do another 100km. It's, comfort-wise, an absolute must! |
|
|
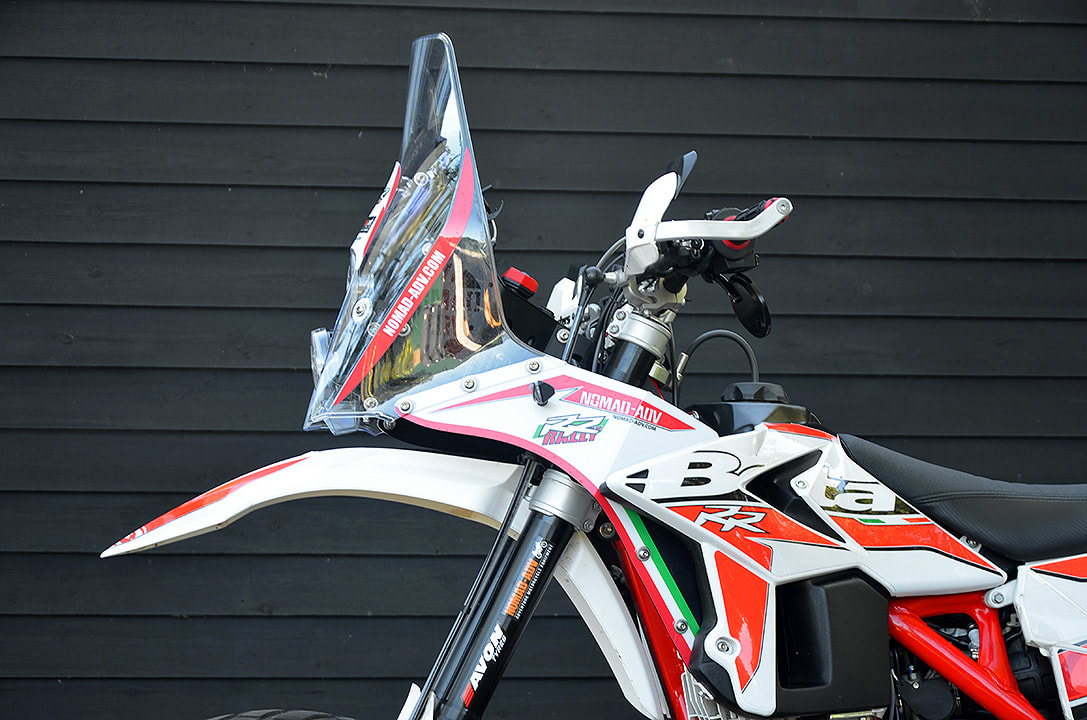
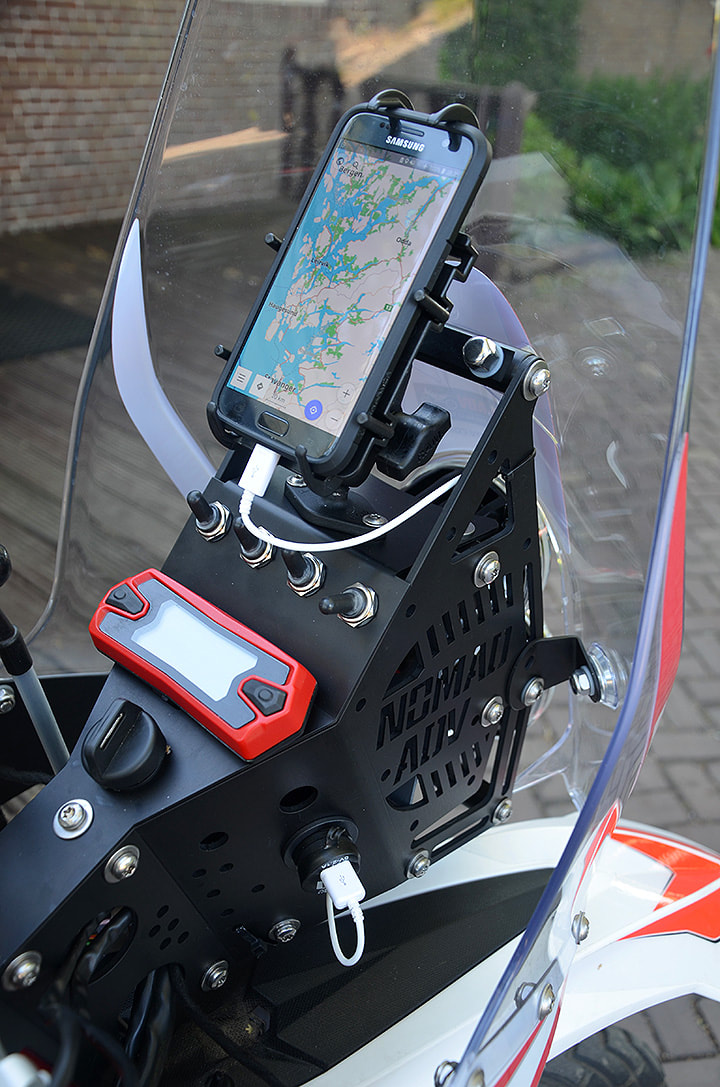
Navigation tower
For longer trips wind protection isn't just handy, it's a must to prevent tiredness. It takes the pressure of my arms and chest, keeps the worst of the rain off for the same reason and increases stability at speed or in windy conditions. The tower is based on the 701 Husqvarna tower we made earlier. It uses the same method of fitment, fully bolted, but is a completely reworked to fit the Beta frame. So much so that only 4 parts are interchangeable between the Husky and the Beta navigation tower. Even the geometry is different. It accepts the original dash, which is now mounted in a better visible spot than OEM. With the tower come two LED headlights of just 10W each which pump out seriously more light than the OEM one. We can also fit Baja Designs lights which have even more output. On the side is a double USB charging point, one of which is used for my phone that doubles as a GPS and camera, while the other is to charge a small Li-ion battery which I use to charge my helmet com and phone on non-riding days. The tower can be expanded into a full rally version, but as I'm using it to travel I have not fitted the rally kit and roadbook or tripmeters on this bike. The tower has 4 waterproof switches which can be wired up as you see fit. I've used the first one to allow both low and high beam on at the same time as that gives me both the nice wide spread of the dipped beam and the distance view of the high beam. With both on they still use less light than the original bulb. The second switch is for heated grips which I might fit in the future, the third is to switch my USB points on or off while the 4th one is to manually operate the fan (which is an accessory from Beta). Being able to switch the fan on prevents the engine from getting hot when stuck in traffic. The fan comes complete with a thermo-switch which switches the fan on when the engine gets too hot. I'm sure that works but there is so much heat coming from the engine, especially in summer traffic jams, that it becomes uncomfortable to the riders' legs. Switch the fan on and the engine temperature remains the same as it's governed by the thermostat but the riders' legs aren't barbecued in the process… There are two more advantages of a manual switch: when riding in wet muddy conditions which aren't hot enough for the fan to come on, the fan can become clogged once the mud dries. Switch it on and the fan pushes the wet mud out preventing it clogging up later. On cold days it's a great way to warm up your gloves and fingers too :-) We've also fitted an ignition lock with a key in the tower, which means the starter motor won't turn without the key and can't be push started without it either. |
|

We already had a short circuit in one on delivery but the others would certainly have followed. We also fitted a new indicator relay for the LEDs. The starter motor button was intermittent, which somehow cleared itself after a while. The thermo switch on the radiator fan failed and has been replaced by one with a lower temperature at the same time. The fan now comes on at 80°C, giving it more time to prevent the radiator from boiling over. The engine temperature is unaffected as that is governed by the thermostat. The thermo switch can be bought at any carparts shop and is as used on a Volvo 340 for instance. The low fuel level sensor stopped working in the first week, a known issue apparently. We haven't bothered to replace it. During our trip to Sweden electrical gremlins raised their heads once more. We had more and more random issues with the dashboard, flashing control lights, the battery indicator showed all sorts of voltages ranging from completely full to totally empty while the bike started fine and ran ok. Then the rear and brake lights started flashing at random intervals, the indicator control light came on (not flashing but just on all the time) with the indicators off. We then found the battery level dropping one bar on the dash, sometimes, when the fan was on. Yet switching the headlights on or off didn't make any difference. The engine started cutting out at random too, yet started straight away again when you pushed the button. Shortly afterwards the battery was suddenly dead. We could still push start it and it showed a healthy battery level on the dash as soon as the engine ran… hmmm. We chased our tail trying to find the problem or problems. We found plenty of potential causes, all of which would have become problems later-on for sure but weren't the cause of the current gremlins. In the end we suspected the battery having a loose internal contact, especially so as the battery levels on the dash were all over the place. Back home though we traced all the issues to one poor connector between the alternator and regulator (the one situated under the tank). It caused voltage spikes all over the place, prevented the battery from being fully charged and generally created chaos in the dash and ECU. The connector seems fine at the surface, it's a proper sealed one too although the actual pins in them are quite small for the current they have to handle. I think the main problem with that connector is though that the male and female part don't belong together. The pins seem too narrow which means they don't clamp and thus start to burn. I decided to cut the connector out altogether and solder the wires together as there is another connector on the regulator itself. I also replaced the one from regulator to battery with new sturdier ones. All fully isolated with heatshrink, wrapped in electrical tape and subsequently protected with cloth tape. The indicator light never came good again, probably damaged from a spike as was the license plate LED, but for the rest all the issues are gone. The dash registers a healthy and consistent 7 bars on the voltmeter, which means, all is well.
The Beta certainly has had its issues and it's in our opinion quality wise not on the same level as a KTM, but … it's also a good 2,000-2,500 Euros less expensive which gives quite a bit of room for improvements. To put it in perspective the Beta 480RR including the Nomad-ADV tower, a Seat Concepts seat, an FMF exhaust and the Nomad-ADV skidplate with toolbox will cost the same as a standard EXC450… Coming back to the electrical system... there is some good news too as despite the voltage spikes the alternator is fine as is the regulator, even the OEM Li-ion battery has survived all the mayhem! |
Barkbusters
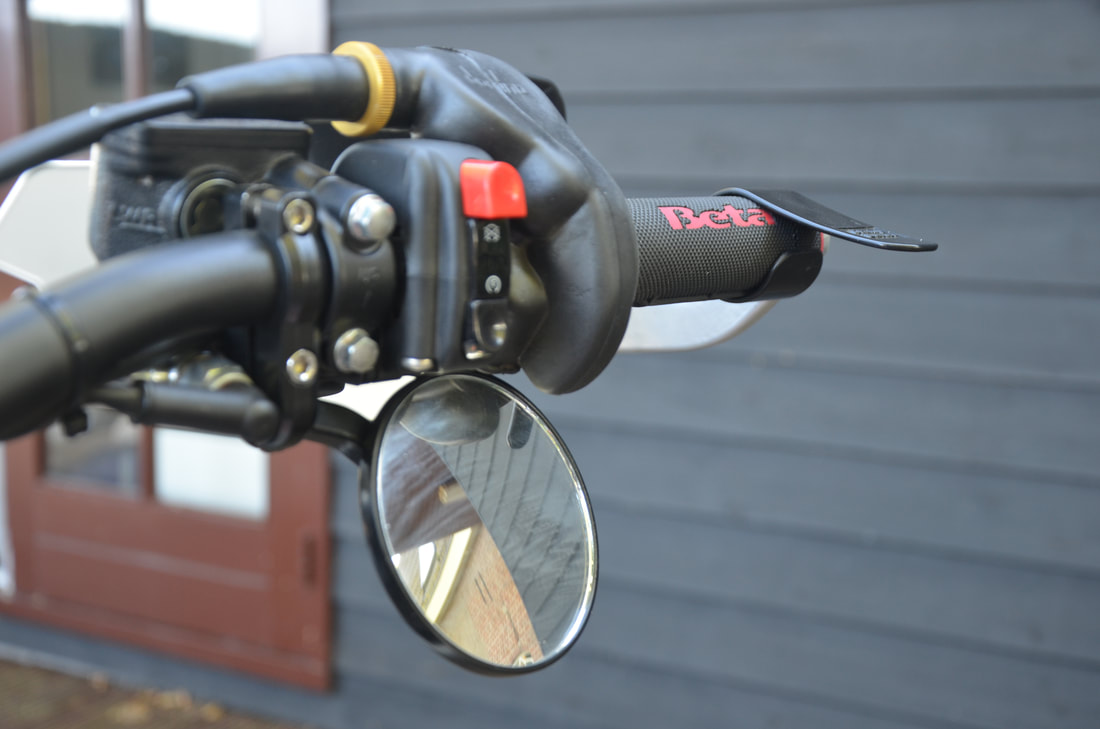
There isn't much to say about them as fitting them is simply a no-brainer. They protect your hands and levers, strengthen the handlebars, protect your hands from the worst of the weather and are even a handy spot to hang your helmet on… with a small cable type lock. Under the skin… There are several modifications which aren't directly visible but make a big difference. I've replaced the micro-sized brake pedal foot for a larger one. The foot as used on the Husqvarna 701 fits straight on. I've added a Tutoro chain oiler, which drips on the lower chain run just after the front sprocket. It works well, does make a bit of a mess at times but as it's oil rather than grease it cleans up easily enough. Tutoro does have a special oil for it but as that's hard to get when travelling I've set mine up for mineral gearbox oil, which is available everywhere and works well without damaging the seals. The big ugly OEM mirrors which vibrate so much that you can't see if it's a moped or a truck behind you, have been replaced with small ones. Below the handlebars works fine without a bag on the rear rack, mount them above the handlebars to see over it. At the rear we fitted a second rear light as the original is very hard to see in inclement weather. Electrical issues Coming back to the electrical issues, which started with a short circuit in the indicators, we have had a host of electrical problems. The indicators have been replaced with LED ones, both for looks but more so as the originals are very poorly made. 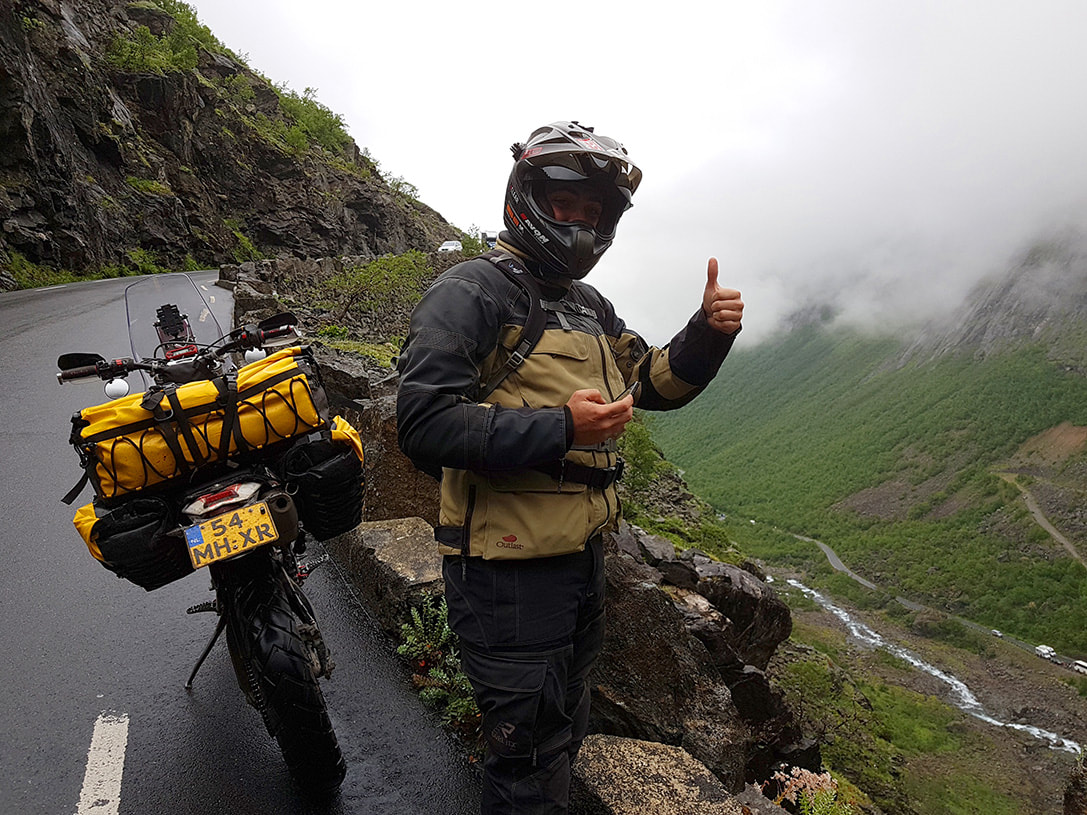
|